Guide for Super Admin
1. Login as an Administrator
The homepage of DepEd Commons is at https://commons.deped.gov.ph/admin/. To login as an administrator, input your administrator credentials on the login form. Click login and you will be redirected to the Admin Portal Dashboard.
On your initial login, you will be redirected to your account profile. You will be asked to update your temporary password.

Figure 1. DepEd Commons Admin Login Page
2. Admin Portal Interface
The user interface for the Admin Portal is very straightforward and easy-to-use. In this chapter, we will discuss the four (4) main parts of this portal.
- Navigation Bar - In this portion, you will see a list of links that will help you access different parts of the Admin Portal.
- Main Content - In this portion, all of the information are displayed in table form. There will be action buttons (view, edit, or delete) for each row. In most modules, there will be a New button displayed on the upper-right part.
- Account actions - you can view your account by clicking this button
 . To logout, simply click this button
  .
. - Filter - to narrow down the list or data displayed in the Main content, you can use the filter fields in this portion. The available fields will vary depending on which module you are currently in.
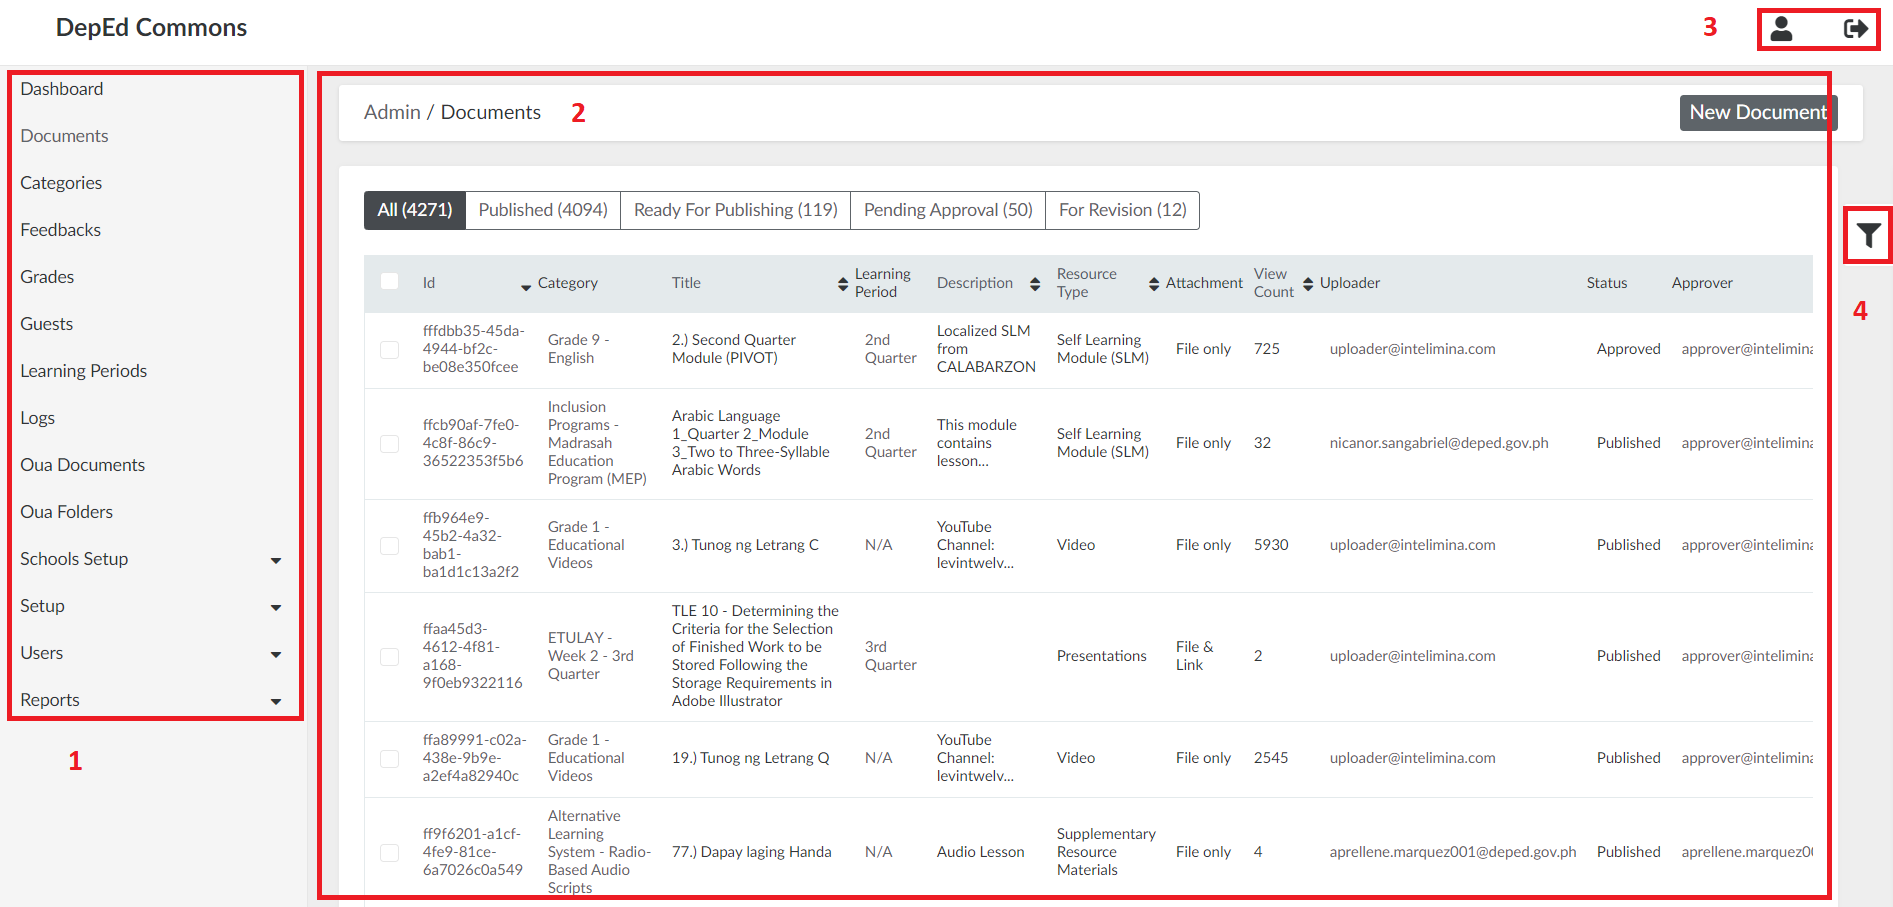
Figure 2. Admin Portal Dashboard
The dashboard is the homepage of the Admin Portal. It contains the bulk upload script, the link to send user report to your email, and teacher's telco demographics.
3. User Management
There are five kinds of users in DepEd Commons: an administrator, an uploader, an approver, a teacher, and a student. As a Super Admin, you have the access to manage all user types. You can create, view, edit, and delete an administrator and a user.
3.1. Administrator
This chapter will focus on managing administrators. As a Super Admin, you can view the list of administrators, create a new one, and you can also view, edit or delete an existing one.
3.1.1. Admin Roles
There are four (4) different admin roles available. Each one has its own access and permissions to the Admin Portal.
- Super Admin - has access to all tasks (create, view, edit, and delete), modules, and reports.
- Central Office - can create, view, edit, and delete teacher and student records.
- DITO - can create, view, edit, and delete teacher and student records within their designated Division.
- CI Approver - can create, view, and edit documents; has the unique role to mark documents as CI Approved.
3.1.2. View Administrator List
To view all the administrators, go to Users, then select Admin Users.
The page displays all admin users of different roles. On the top, you can click on the headers to arrange the list. For example if you click on Created At then it will display the most recently created admin user account. If you click on the filter icon on the top right side, you can search for an admin user by email.
On the bottom, you can download the list of administrators displayed by clicking CSV.

Figure 3. Administrator List
3.1.3. Create a New Administrator
Step 1. Go to Users, then select Admin Users.
Step 2. On the upper-right portion of the page, click the "New Admin User" button.
Step 3. Fill out the new administrator form.
-
- Role - select the role you want to assign to the new administrator (see Chapter 3.1.1).
- Region - this is a required field only if you have selected the DITO role.
- Division - this is a required field only if you have selected the DITO role.
- Account credentials - input the email of the new admin, and generate a random password for them.
After giving the credentials, please advise the new administrator to update their password on their initial login.
Step 4. Click the "Create Admin user" button.
3.1.4. View a Specific Administrator
Step 1. Go to Users, then select Admin Users.
Step 2. Search the specific administrator, and click their Administrator ID or the View button on the right.

Figure 4. Administrator ID (green box) and Action Buttons (yellow box)
In the view page, you can see the administrator details.
3.1.5. Edit an Administrator
Step 1. Go to Users, then select Admin Users.
Step 2. Search the specific administrator, and click the Edit button on the right.
Step 3. Update the administrator user details.
Step 4. Click the "Update Admin user" button.
3.2. Teacher
This chapter will focus on managing teacher accounts. As a Super Admin, you can view the list of teachers, create a new one, and you can also view, edit or delete an existing one.
3.2.1. View Teacher List
To view teacher accounts, simply click Users on the navigation bar and select Teacher Accounts.
On the top, you can filter the list by clicking a specific status:
-
- Pre-approved - users that have been added to the database of the system and will no longer need to sign up
- Self-signed - users that have gone through the sign up process
More filters are available if you click the filter icon on the right. Available filter fields are: Name, Email address, Is Teaching, Invite Sent, Confirmed, Verified, Region, Division, and Municipality.
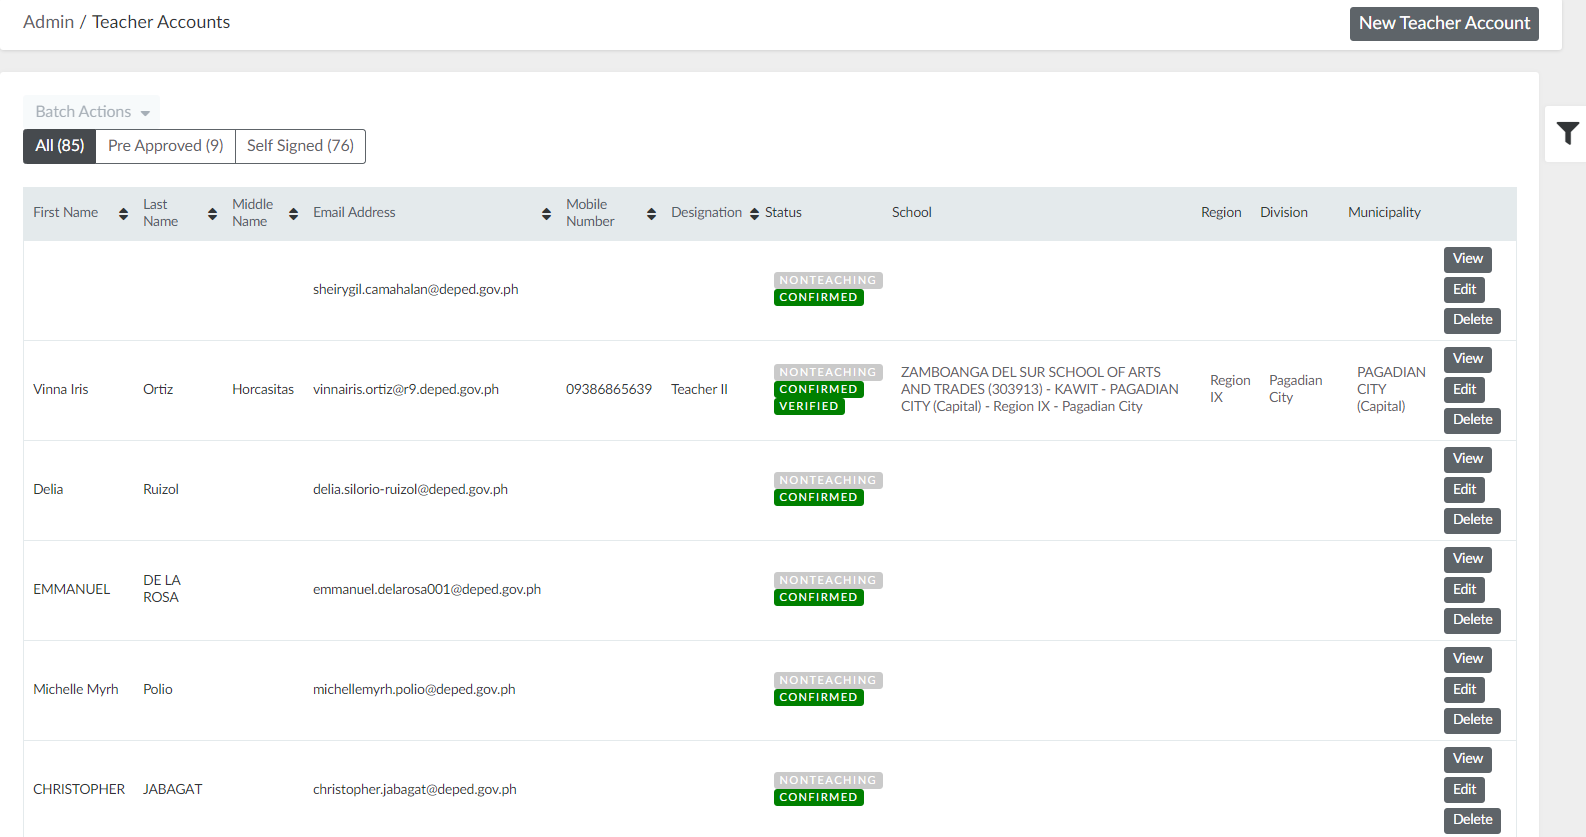
Figure 5. Teacher Accounts List
3.2.2. Create a New Teacher Account
Step 2. On the upper-right portion of the page, click the "New Teacher Account" button.
Step 3. Fill out the new user form (account information, personal info, and location assignment).
Step 4. Click the "Create Account" button.
After creating a user, a confirmation email will be sent to them. This is part of their approval process, so it is very important that you have encoded the correct email address.
3.2.3. View a Specific Teacher Account
Step 2. Search the specific user, and click the View button on the right.
In the view page, you can see the following data:
-
- Teacher Account Details - general information of the user
- Contact Info and Status - contains email address of user and account status
3.2.4. Verify User
An account can only be verified if the user has already confirmed their email address. To verify a teacher account, follow these simple steps:
Step 2. Click the View button on the right.
Step 4. Click the Verify button on the upper-right portion of the view page.
3.2.5. Edit a Teacher Account
Step 2. Search the specific user, and click the Edit button on the right.
Step 3. Update the account details.
Step 4. Click the "Update Account" button.
3.2.6. Delete a Teacher Account
Step 2. Search the specific user, and click the Delete button on the right.
3.3. Student
This chapter will focus on managing student accounts. As a Super Admin, you can view the list of students, create a new one, and you can also view, edit or delete an existing one.
3.3.1. View Student List
To view student accounts, simply click Users on the navigation bar and select Student.
On the top, you can click on the headers to arrange the list. For example if you click on Confirmed At then it will display the most recently confirmed student account.
More filters are available if you click the filter icon on the right. Available filter fields are: Email address and Activated.
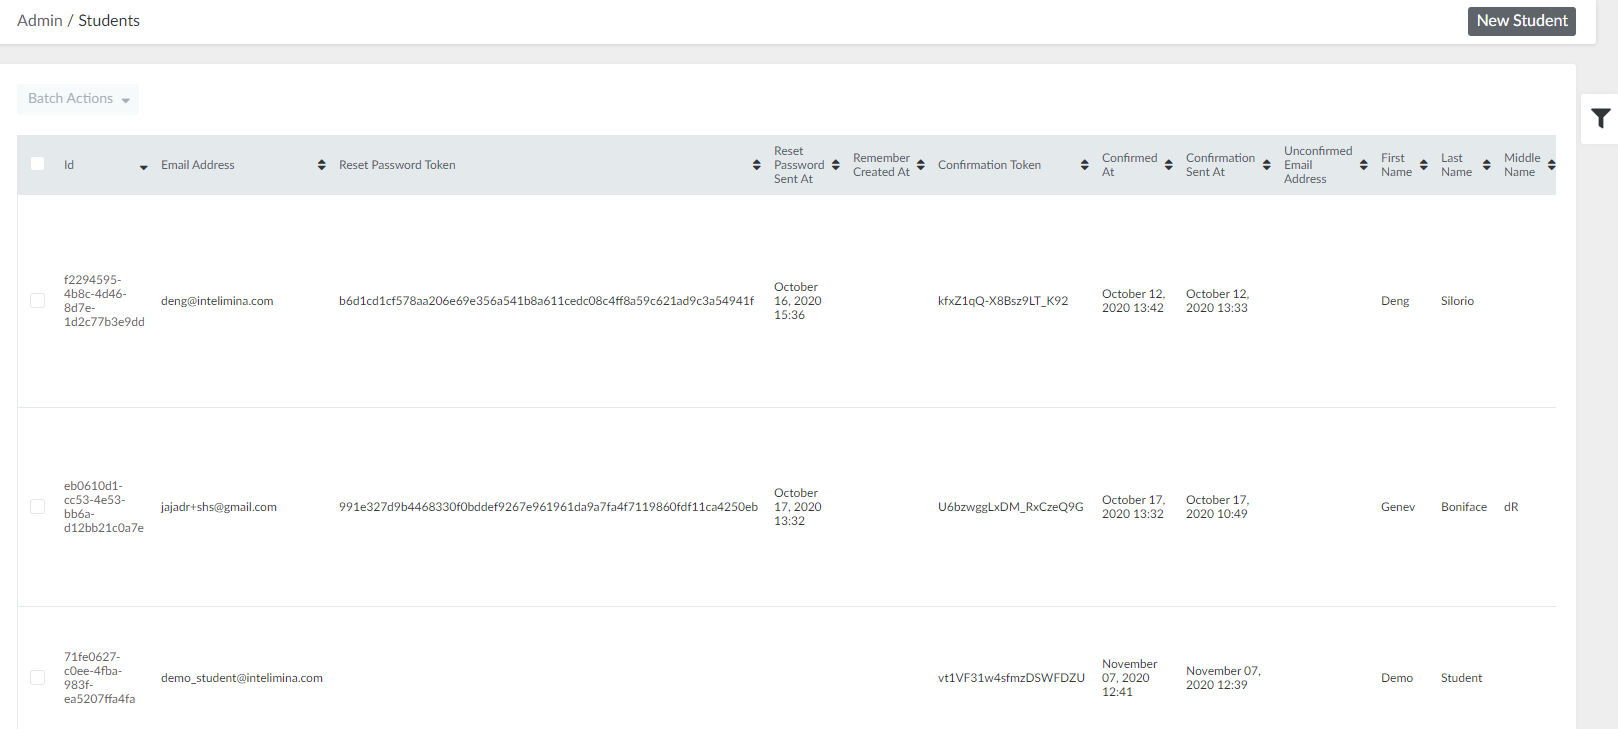
Figure 6. Student Accounts List
3.3.2. Create a New Student Account
Step 2. On the upper-right portion of the page, click the "New Student" button.
Step 3. Fill out the new user form (profile and credentials).
Step 4. Click the "Create Student" button.
After creating a user, a confirmation email will be sent to them. This is part of their approval process, so it is very important that you have encoded the correct email address.
3.3.3. View a Student Account
Step 2. Search the specific user, and click the View button on the right.
In the view page, you can see the general information about the student account.
3.3.4. Edit a Student Account
Step 2. Search the specific user, and click the Edit button on the right.
Step 3. Update the account details.
Step 4. Click the "Update Student" button.
3.3.5. Delete a Student Account
Step 2. Search the specific user, and click the Delete button on the right.
3.4. Uploader
This chapter will focus on managing uploader accounts. As a Super Admin, you can view the list of students, create a new one, and you can also view, or edit an existing one.
3.4.1. View Uploader List
To view uploaders accounts, simply click Users on the navigation bar and select Uploaders.
On the top, you can click on the headers to arrange the list. For example if you click on Email Address then it will display the uploader accounts in descending order alphabetically.
More filters are available if you click the filter icon on the right. Available filter fields are: Email address and Name.
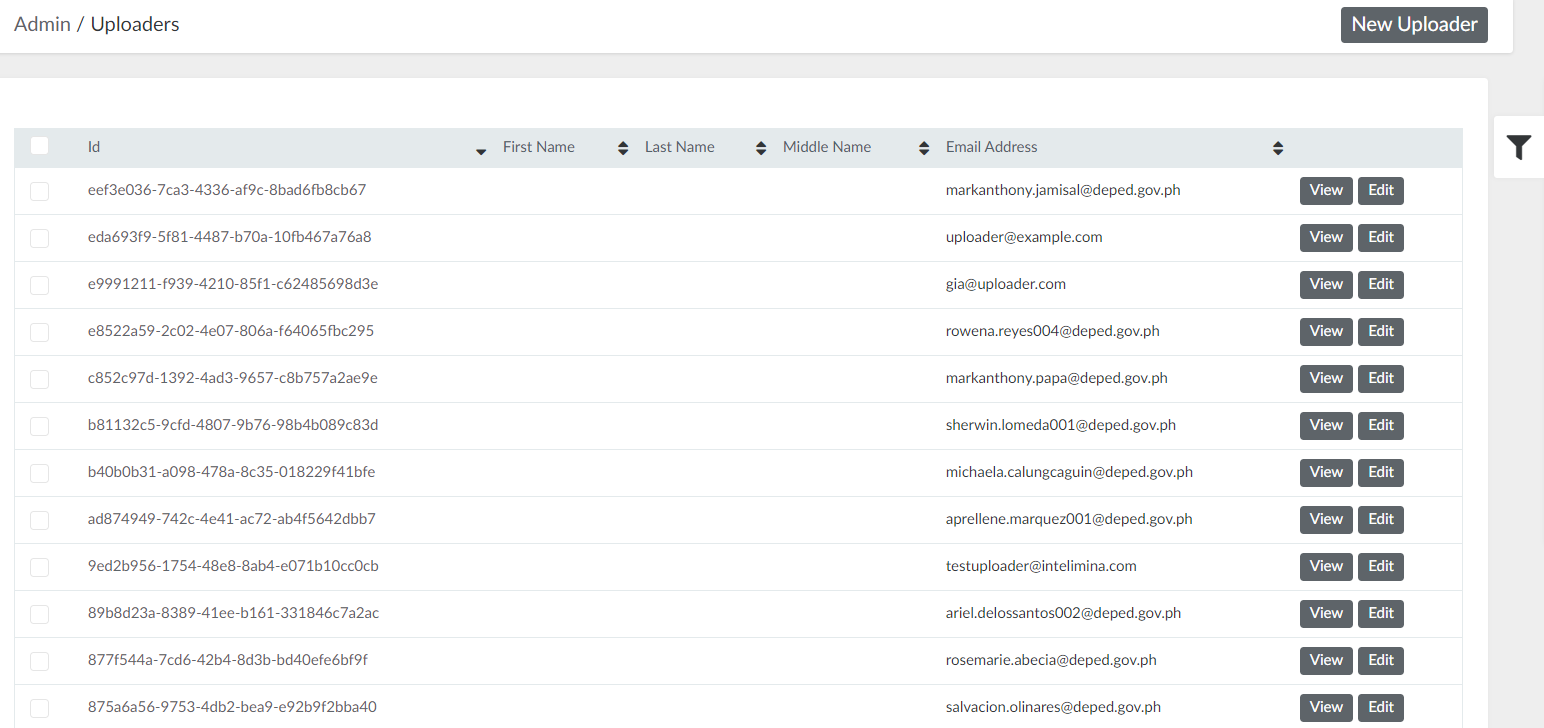
Figure 7. Uploader Accounts List
3.4.2. Create a New Uploader Account
Step 2. On the upper-right portion of the page, click the "New Uploader" button.
Step 3. Fill out the new uploader form.
Step 4. Click the "Create Uploader" button.
3.4.3. View an Uploader Account
Step 2. Search the specific user, and click the View button on the right.
In the view page, you can see the general information about the uploader account.
3.4.4. Edit an Uploader Account
Step 2. Search the specific user, and click the Edit button on the right.
Step 3. Update the account details.
Step 4. Click the "Update Uploader" button.
3.5. Approver
This chapter will focus on managing uploader accounts. As a Super Admin, you can view the list of students, create a new one, and you can also view, or edit an existing one.
3.5.1. View Approver List
To view approvers accounts, simply click Users on the navigation bar and select Approvers.
On the top, you can click on the headers to arrange the list. For example if you click on Email Address then it will display the approver accounts in descending order alphabetically.
More filters are available if you click the filter icon on the right. Available filter fields are: Email address and Name.
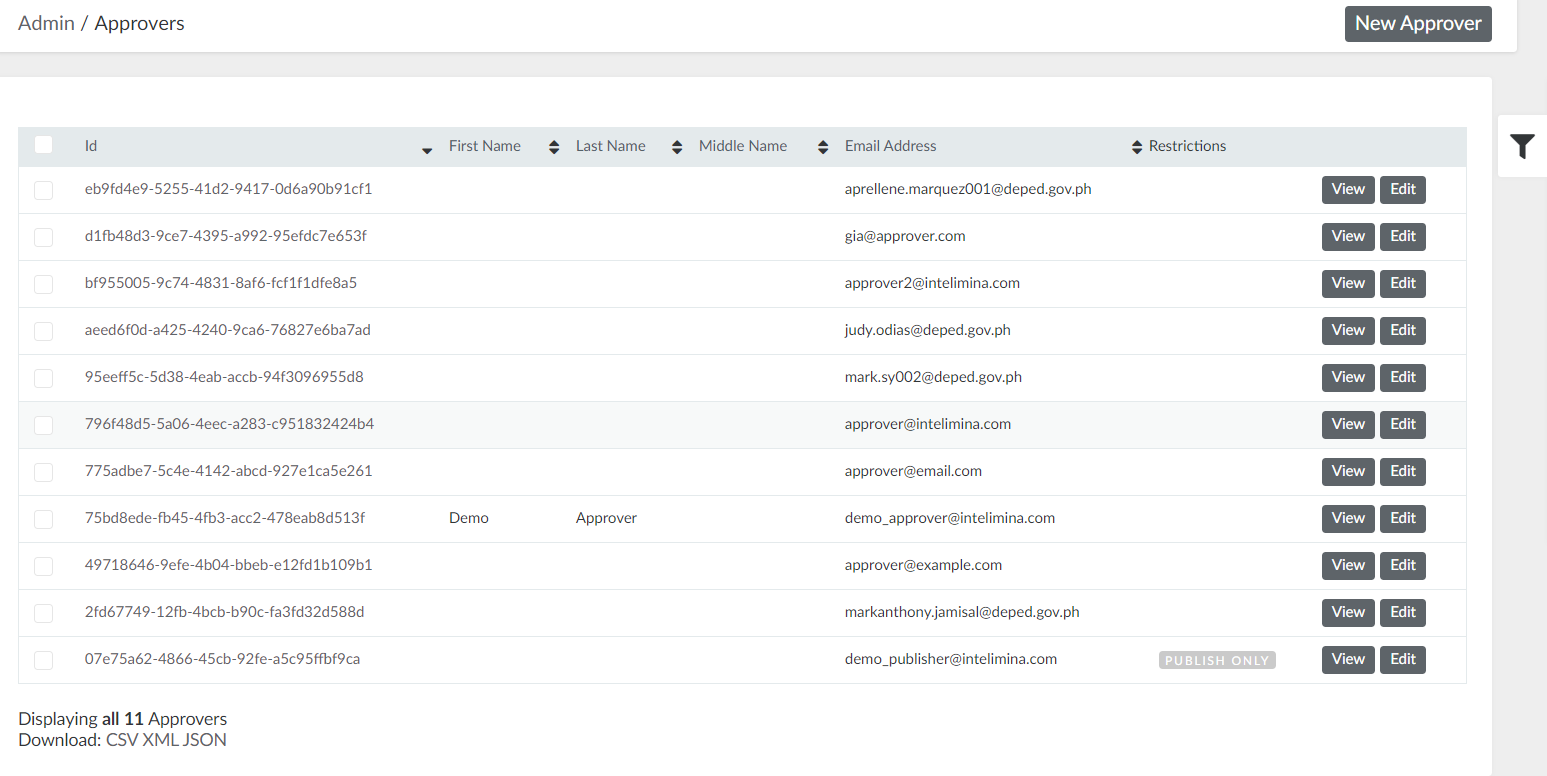
Figure 8. Approver Accounts List
3.5.2. Create a New Approver Account
Step 2. On the upper-right portion of the page, click the "New Approver" button.
Step 3. Fill out the new approver form.
Step 4. Select restriction to approve and publish to create an approver account or select publish only to create a publisher account.
Step 4. Click the "Create Approver" button.
Publisher accounts can only publish resources that are already approved by an Approver.
3.5.3. View an Approver Account
Step 2. Search the specific user, and click the View button on the right.
In the view page, you can see the general information about the approver account.
3.5.4. Edit an Approver Account
Step 2. Search the specific user, and click the Edit button on the right.
Step 3. Update the account details.
Step 4. Click the "Update Approver" button.
4. Document Management
4.1. View Document List
To view all the documents, click Documents on the side navigation bar.
On the top, you can filter the list by the document's status (published, ready for publishing, pending approval, and for revision).
More filters are available if you click the filter icon on the right. Available filter fields are: Category, Grade, Learning Period, Title, Description, Uploader, Approver, CI Approver, Overall rating, Scheduled for Publish.
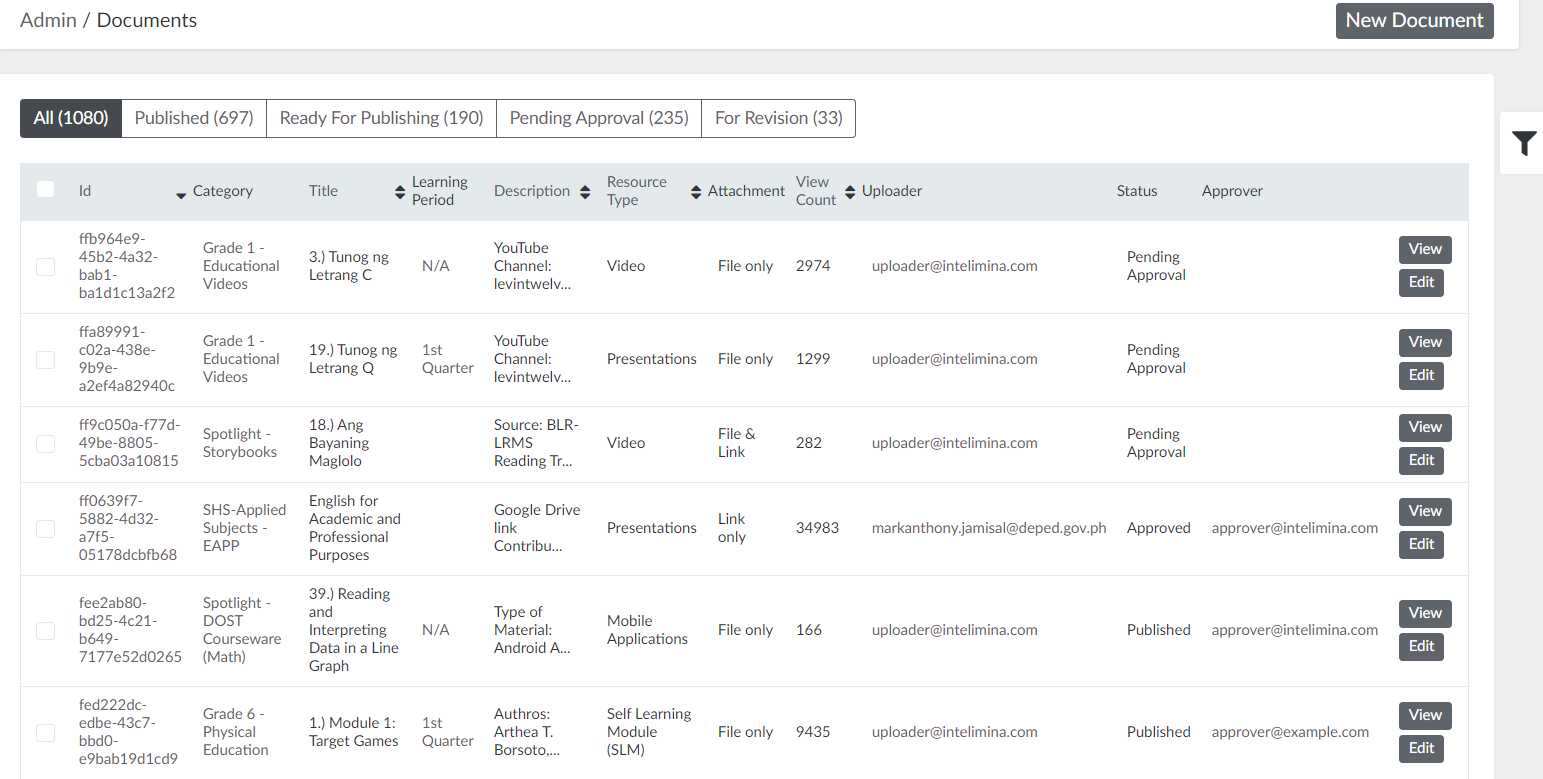
Figure 9. Documents List
4.2. Create a New Document
Step 1. On the navigation bar, go to Documents.
Step 2. On the upper-right portion of the page, click the "New Document" button.
Step 3. Fill out the new document form.
-
- Category - grade level and subject where the document will be uploaded to.
- Title - the title of the resource that will be displayed on the web app.
- Description - details or other relevant information to describe the document.
- Link - link to access the document online
- Learning period - learning period that the document will be accessible
- Resource type - type of learning material
- Authors - author/s of the document
- Contributors - contributor/s of the document
- Tags - relevant keywords that can be used to search for the document
- File - file attachment of the document
- Thumbnail - the image that will be displayed when viewing document details
Step 4. Click "Create Document" button.
4.3. View Document
Step 1. On the navigation bar, go to Documents.
Step 2. Search the specific document, and click the View button on the right.
In the view page, you can see the general information and status of the document.
To view document reports, click on View Reports. This will show Daily views over the past month and monthly views over the past year.
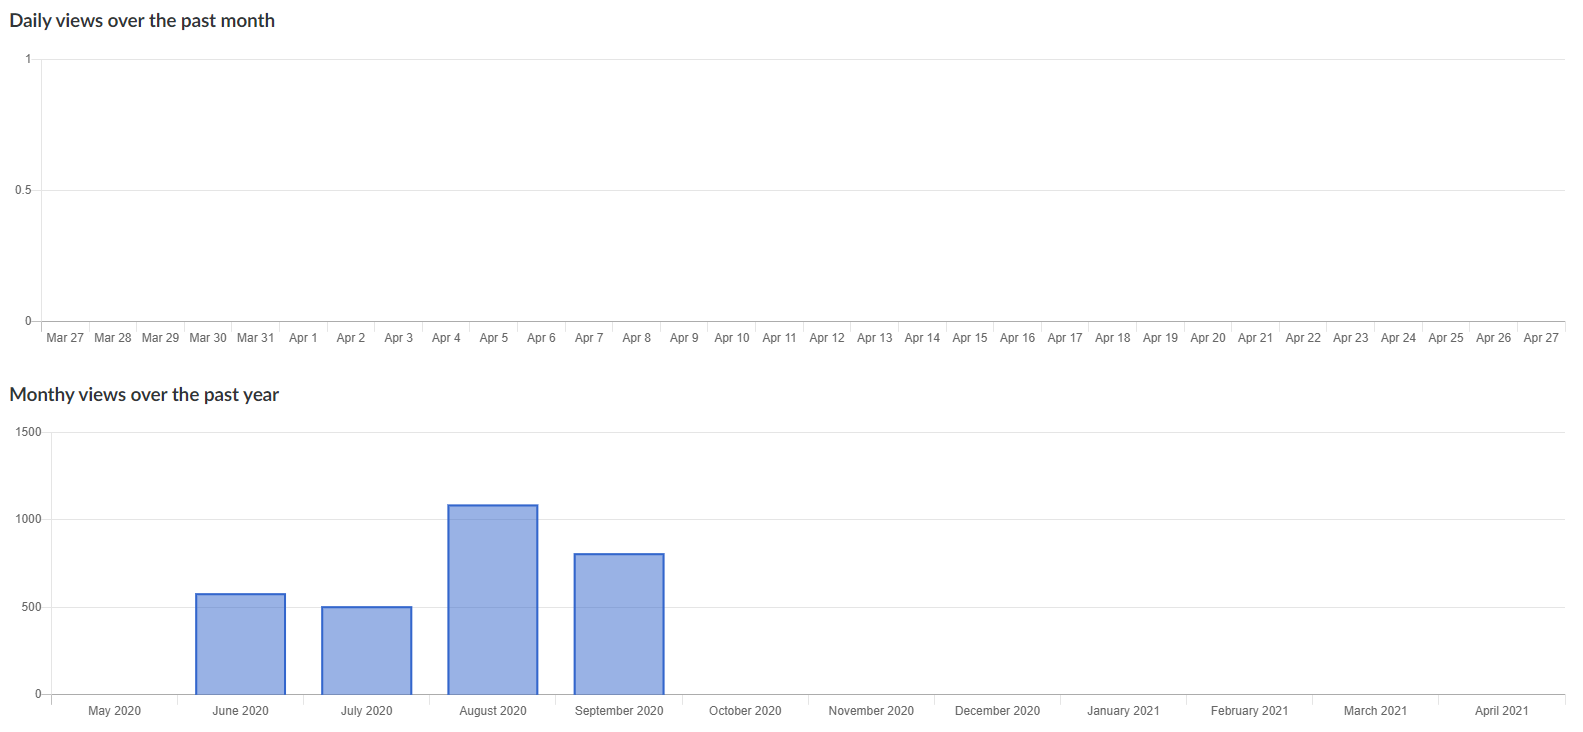
Figure 10. Document Report
4.4. Edit a Document
Step 2. Search the specific document, and click the Edit button on the right.
Step 3. Update the document details.
Step 4. Click the "Update Document " button.
5. Category Management
5.1. View Category List
To view all the categories, click Categories on the side navigation bar.
On the top, you can click on the headers to arrange the list. For example if you click on Updated At, it will display categories in order of update date; the most recently updated being first.
More filters are available if you click the filter icon on the right. Available filter fields are: Grade, Documents, Approved Documents, Published Documents, Name, Created At, and Updated At.
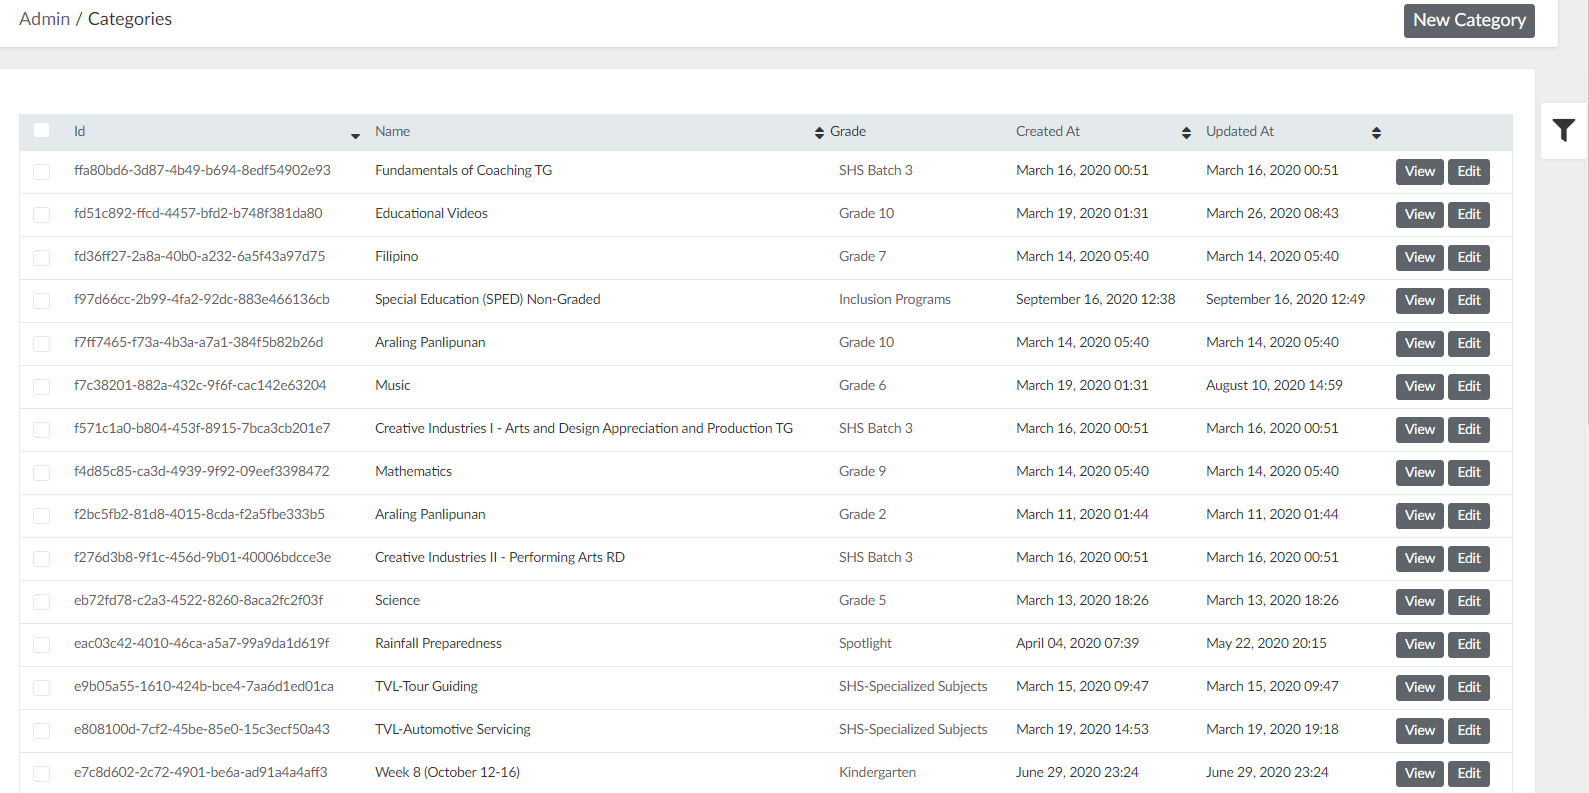
Figure 11. Categories List
5.2. Create a New Category
Step 2. On the upper-right portion of the page, click the "New Category" button.
Step 3. Fill out the new category form.
-
- Grade level - grade level where the category belongs to
- Name - name of the category that will be displayed on the subject list/drop down
Step 4. Click "Create Category" button.
5.3. View Category
Step 2. Search the specific category, and click the View button on the right.
In the view page, you can see the category details.
5.4. Edit a Category
Step 2. Search the specific category, and click the Edit button on the right.
Step 3. Update the category details.
Step 4. Click the "Update Category " button.
6. Feedback Management
6.1. View Feedbacks
To view all the feedbacks, click Feedbacks on the side navigation bar.
On the top, you can click on the headers to arrange the list. For example if you click on Name, it will display the names alphabetically in descending order .
More filters are available if you click the filter icon on the right. Available filter fields are: School, Name, Email address, Concern, Message, Created At, Updated At, Identity, Student Name, Mobile Number, Grade Level, and Lrn.
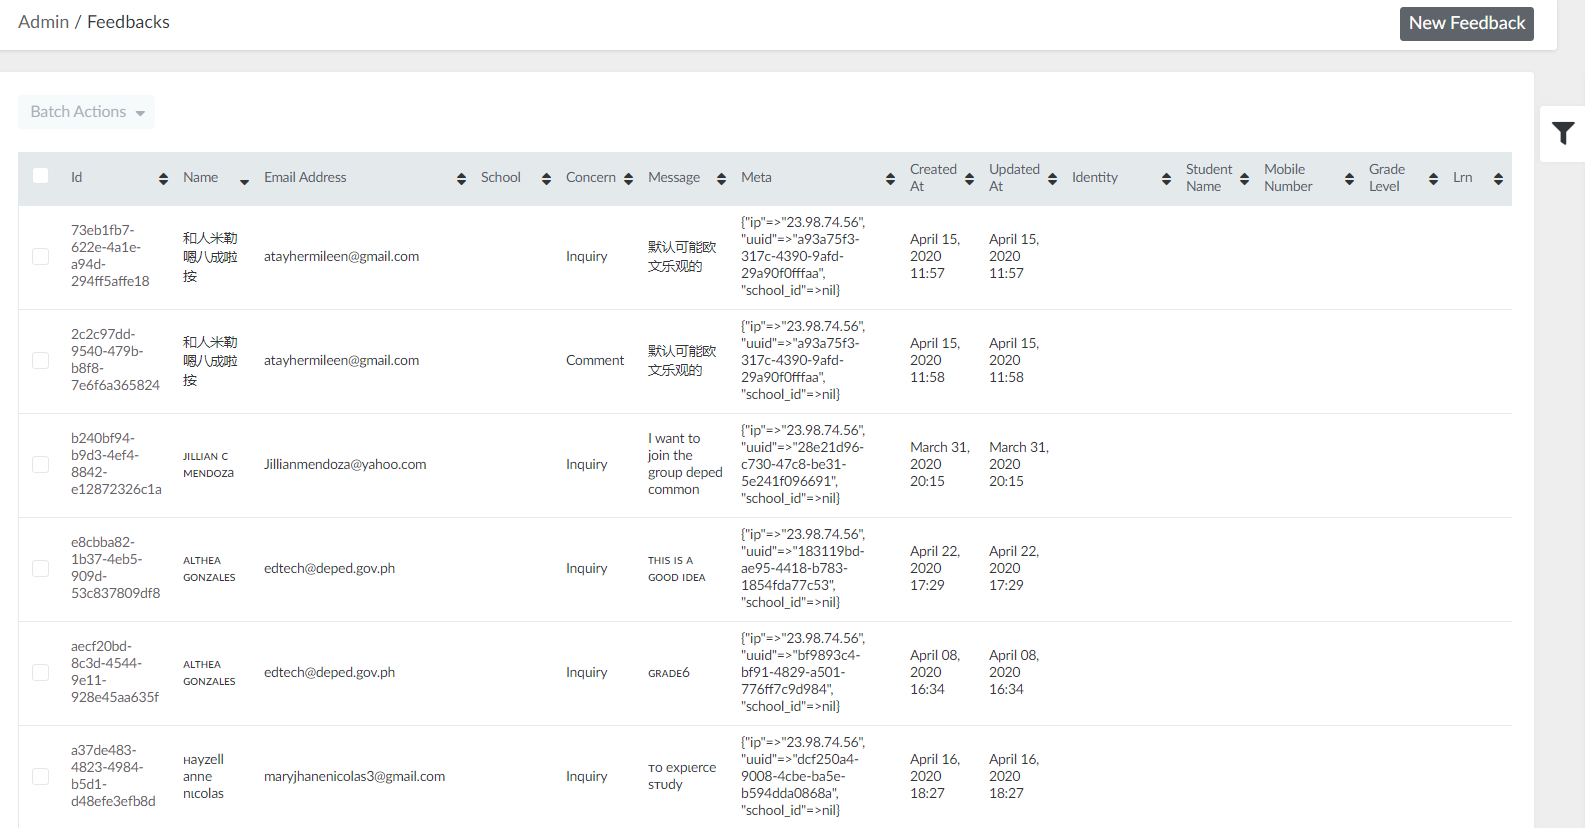
Figure 12. Feedback List
6.2. View Feedback
Step 2. Search the specific feedback, and click the View button on the right.
In the view page, you can see the feedback details.
7. Grade Level Management
7.1. View Grade Levels
To view all the grade levels, click Grades on the side navigation bar.
On the top, you can click on the headers to arrange the list. For example if you click on Updated At, it will display the grade levels in order of update date; the most recently updated being first.
More filters are available if you click the filter icon on the right. Available filter fields are: Categories, Documents, Approved Documents, Published Documents, Name, Ordinality Created At, Updated At, Is Enabled.
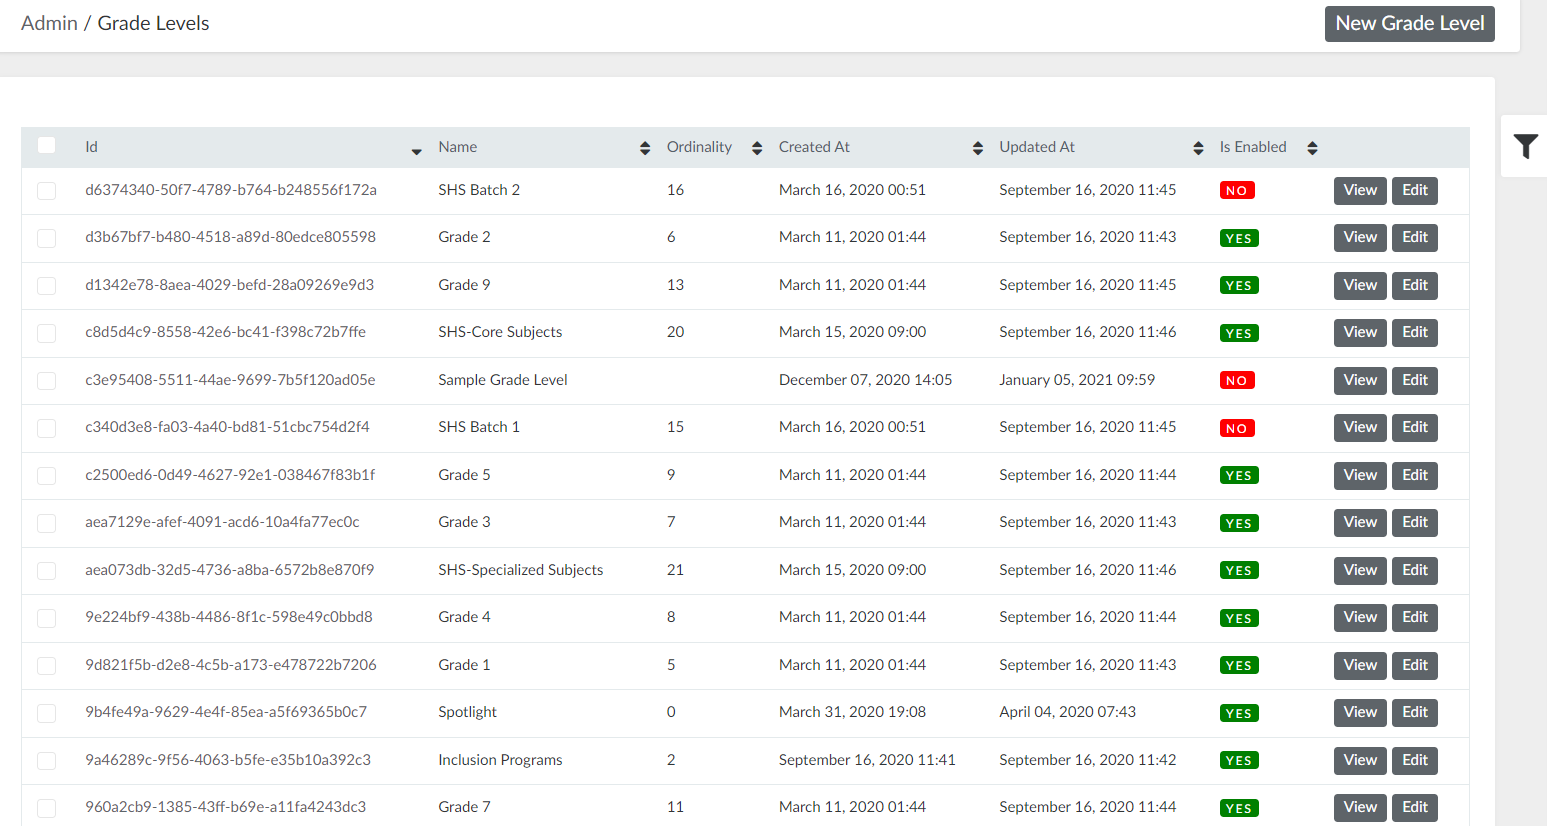
Figure 13. Grade Levels List
7.2. Create a New Grade Level
Step 2. On the upper-right portion of the page, click the "New Grade Level" button.
Step 3. Fill out the new grade level form.
-
- Name - name of the grade level that will be displayed on the grade levels list/drop down
- Ordinality - accepts numeric value and dictates the order of the grade level on the list; not a required field
- Is enabled - by default this is ticked so that the grade level is visible on the web app; untick the box if you do not want the grade level to be visible and accessible
Step 4. Click "Create Grade Level" button.
7.3. View Grade Level
Step 2. Search the specific grade level, and click the View button on the right.
In the view page, you can see the grade level details.
7.4. Edit a Grade Level
Step 2. Search the specific grade level, and click the Edit button on the right.
Step 3. Update the grade level details.
Step 4. Click the "Update Grade Level" button.
8. Guests Management
8.1. View Guests
To view all the guests, click Guests on the side navigation bar.
On the top, you can click on the headers to arrange the list. For example if you click on Created At, it will display guests in order of creation date; the most recently created being first.
More filters are available if you click the filter icon on the right. Available filter fields are: School, Guest Type, Name, Email address, Is public, Downloads, Links, Pages, Created At, and Updated At.
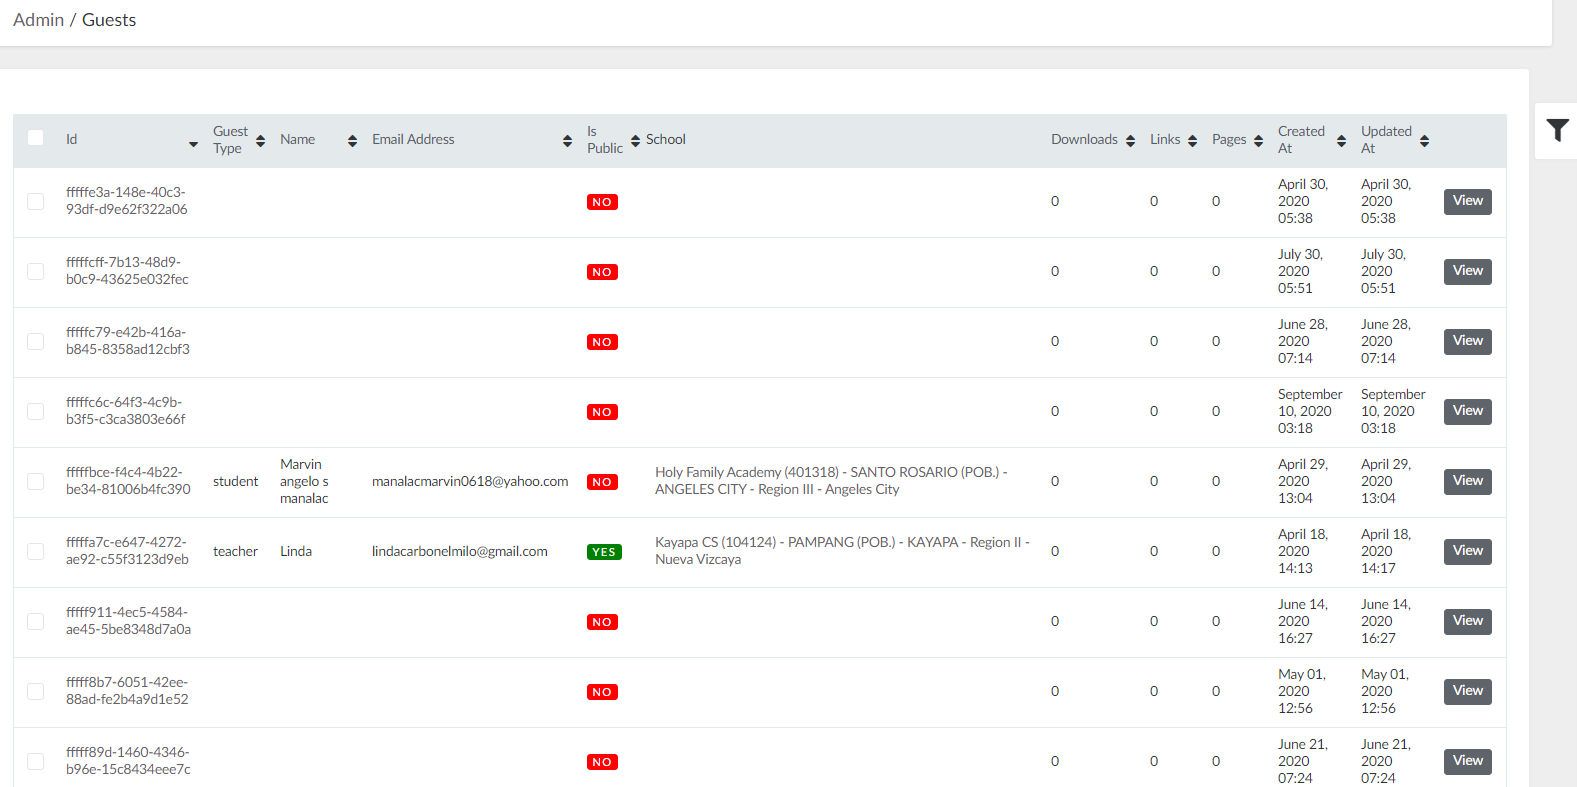
Figure 14. Guests List
8.2. View Guest
Step 2. Search the specific guest, and click the View button on the right.
In the view page, you can see the guest details.
9. Learning Period Management
9.1. View Learning Periods
To view all the learning periods, click Learning Periods on the side navigation bar.
On the top, you can click on the headers to arrange the list. For example if you click on Created At, it will display learning periods in order of creation date; the most recently created being first.
More filters are available if you click the filter icon on the right. Available filter fields are: Name, Created At, and Updated At.
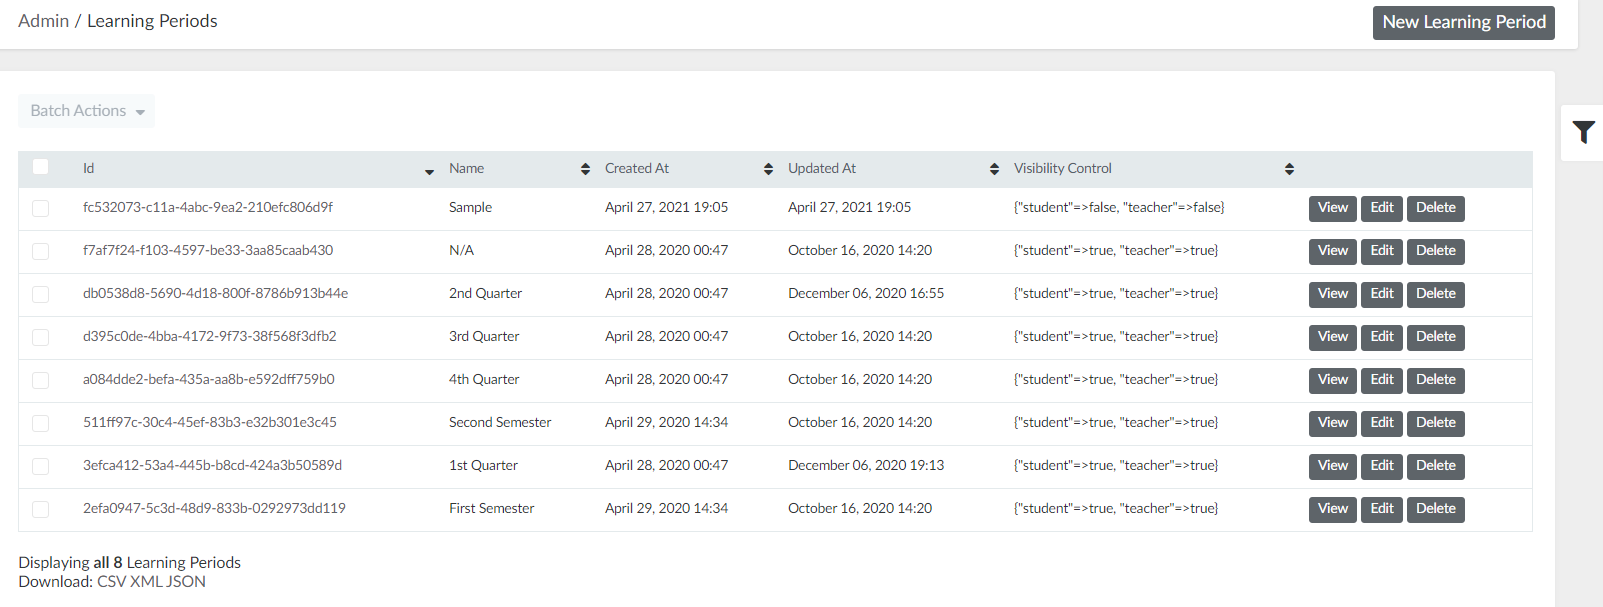
Figure 15. Learning Periods List
9.2. Create a New Learning Period
Step 2. On the upper-right portion of the page, click the "New Learning Period" button.
Step 3. Fill out the new learning period form.
-
- Name - name of the learning period that will be displayed on the learning period list/drop down
- Visibility Control - select yes to make the learning period visible to students and/or teachers; otherwise, documents under the learning period will not be visible to students and/or teachers.
Step 4. Click "Create Learning Period" button.
9.3. View Learning Period
Step 2. Search the specific learning period, and click the View button on the right.
In the view page, you can see the learning period details.
9.4. Edit a Learning Period
Step 2. Search the specific learning period, and click the Edit button on the right.
Step 3. Update the learning period details.
Step 4. Click the "Update Learning Period" button.
9.5. Delete a Learning Period
Step 2. Search the specific learning period, and click the Delete button on the right.
You can also delete multiple learning periods at the same time. Select multiple learning periods by ticking the box on the left. Click "Batch Actions", then "Delete Selected".

Figure 16. Delete Multiple Learning Periods
10. View Logs
To view the logs, click Logs on the side navigation bar.
On the top, you can click on the headers to arrange the list. For example if you click on Created At, it will display logs in order of creation date; the most recently created being first.
More filters are available if you click the filter icon on the right. Available filter fields are: Actor type, Document, UUID, Action, Created At, Updated At, and Version.
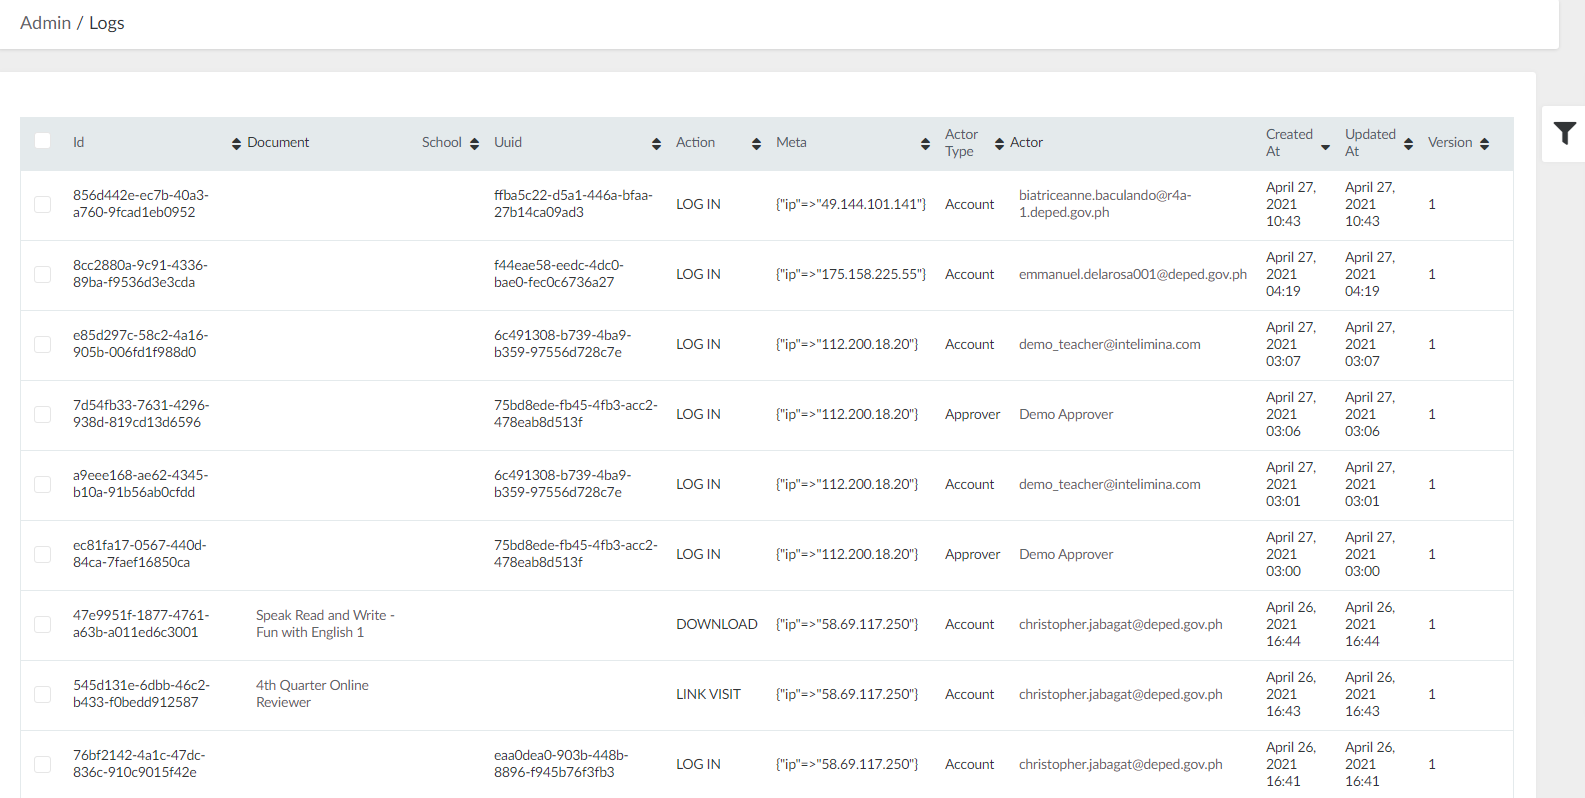
Figure 17. List of Logs
11. Memoranda
Administrators can setup memos and official announcements published in DepEd Commons that can be viewed by the users. To manage these, click Memoranda on the navigation bar. Memo Spaces, Memo Folders, and Memos should appear on the drop down.
11.1. Memo Spaces
This chapter will focus on managing memo spaces. A memo space is where memo folders are found. As a Super Admin, you can view the list of memo spaces, create a new one, and you can also view, edit, or delete an existing one.
11.1.1. View Memo Spaces
To view the list of memo spaces, simply click Memoranda on the navigation bar and select Memo Spaces.
On the top, you can click on the headers to arrange the list. For example if you click on Title then it will display the memo spaces in descending order alphabetically.
More filters are available if you click the filter icon on the right. Available filter fields are: OUA folders, Title, Short Name, Created at, and Updated at.
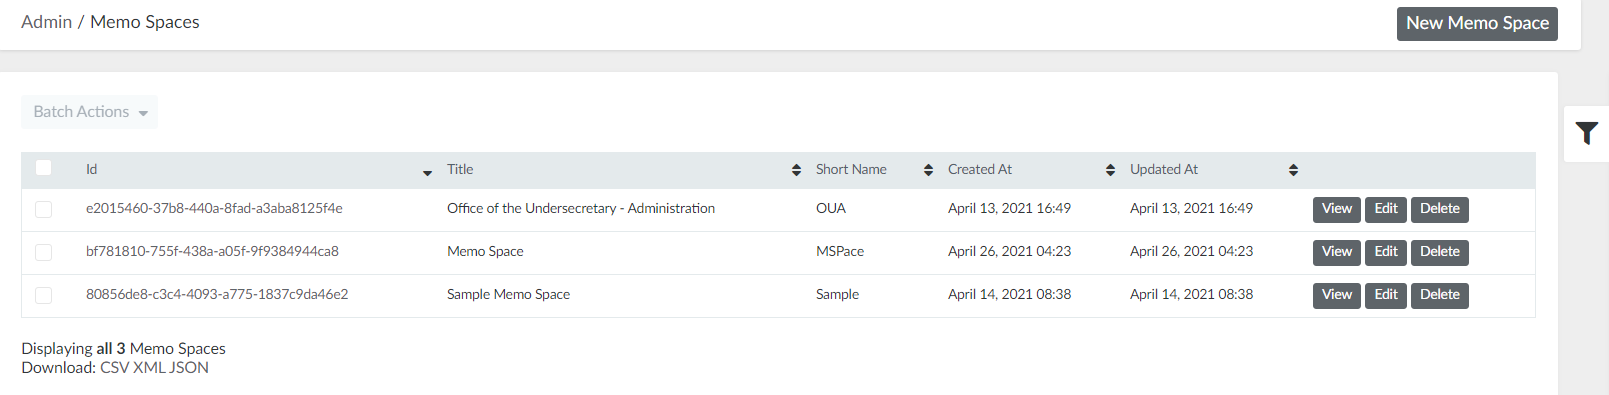
Figure 18. Memo Spaces List
11.1.2. Create a New Memo Space
Step 2. On the upper-right portion of the page, click the "New Memo Space" button.
Step 3. On the Details tab, fill out the form. You may add or rename a memo folder on the memo space.
Step 4. Click the "Create Memo space" button.
11.1.3. View a Memo Space
Step 2. Search the specific memo space, and click the View button on the right.
In the view page, you can see the general information about the memo space and the folders under the memo space.
11.1.4. Edit a Memo Space
Step 2. Search the specific memo space, and click the Edit button on the right.
Step 3. Update the memo space details.
Step 4. Click the "Update Memo space" button.
11.1.5 Delete a Memo Space
Step 2. Search the specific memo space, and click the Delete button on the right.
You can also delete multiple memo spaces at the same time. Select multiple memo spaces by ticking the box on the left. Click "Batch Actions", then "Delete Selected".
Figure 19. Delete Multiple Memo Spaces
11.2. Memo Folders
This chapter will focus on managing memo folders. Memos are categorized based on which memo folders they belong to. As a Super Admin, you can view the list of memo folders, create a new one, and you can also view, edit, or delete an existing one.
11.2.1. View Memo Folders
To view the list of memo spaces, simply click Memoranda on the navigation bar and select Memo Folders.
On the top, you can click on the headers to arrange the list. For example if you click on Name then it will display the memo folders in descending order alphabetically.
More filters are available if you click the filter icon on the right. Available filter fields are Name and Memo Space.
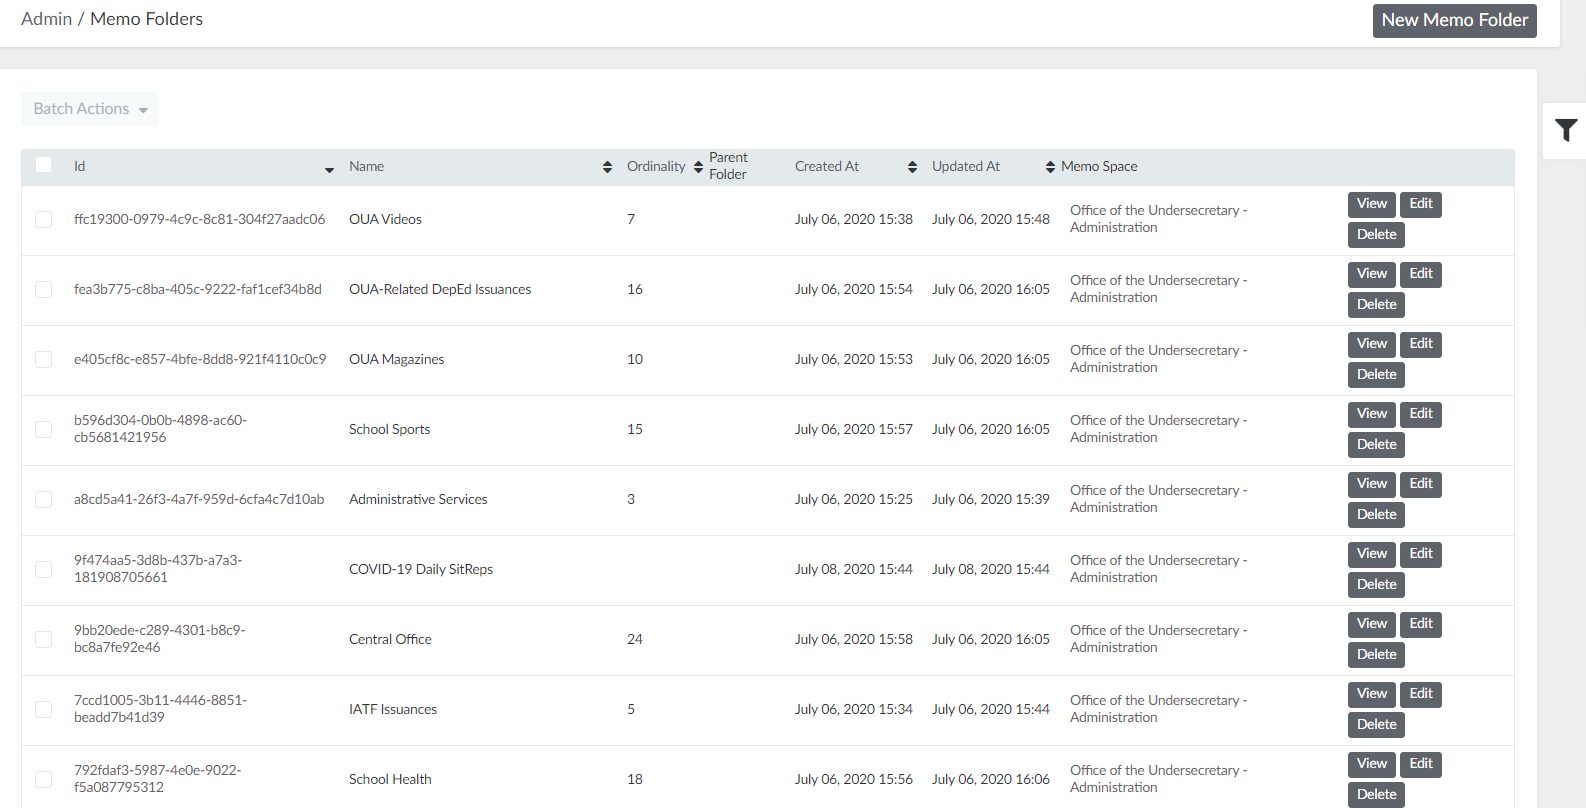
Figure 20. Memo Folders List
11.2.2. Create a New Memo Folder
Step 2. On the upper-right portion of the page, click the "New Memo Folder" button.
Step 3. Fill out the new memo folder form. Select which memo space the memo folder belongs to.
Step 4. Click the "Create Memo folder" button.
11.2.3. View a Memo Folder
Step 2. Search the specific memo folder, and click the View button on the right.
In the view page, you can see the general information about the memo folder and the memos located in the memo folder.
11.2.4. Edit a Memo Folder
Step 2. Search the specific memo folder, and click the Edit button on the right.
Step 3. Update the memo folder details.
Step 4. Click the "Update Memo folder" button.
11.2.5 Delete a Memo Folder
Step 2. Search the specific memo folder, and click the Delete button on the right.
You can also delete multiple memo folders at the same time. Select multiple memo folders by ticking the box on the left. Click "Batch Actions", then "Delete Selected".
Figure 21. Delete Multiple Memo Folders
11.3. Memos
This chapter will focus on managing memos. Memos are categorized based on which memo folders they belong to. As a Super Admin, you can view the list of memos, create a new one, and you can also view, edit, or delete an existing one.
11.3.1. View Memo Folders
To view the list of memo spaces, simply click Memoranda on the navigation bar and select Memos.
On the top, you can click on the headers to arrange the list. For example if you click on Name then it will display the memos in descending order alphabetically.
More filters are available if you click the filter icon on the right. Available filter fields are: OUA folder, file attachment, file blob, Name, Ordinality, Created at, and Updated at.
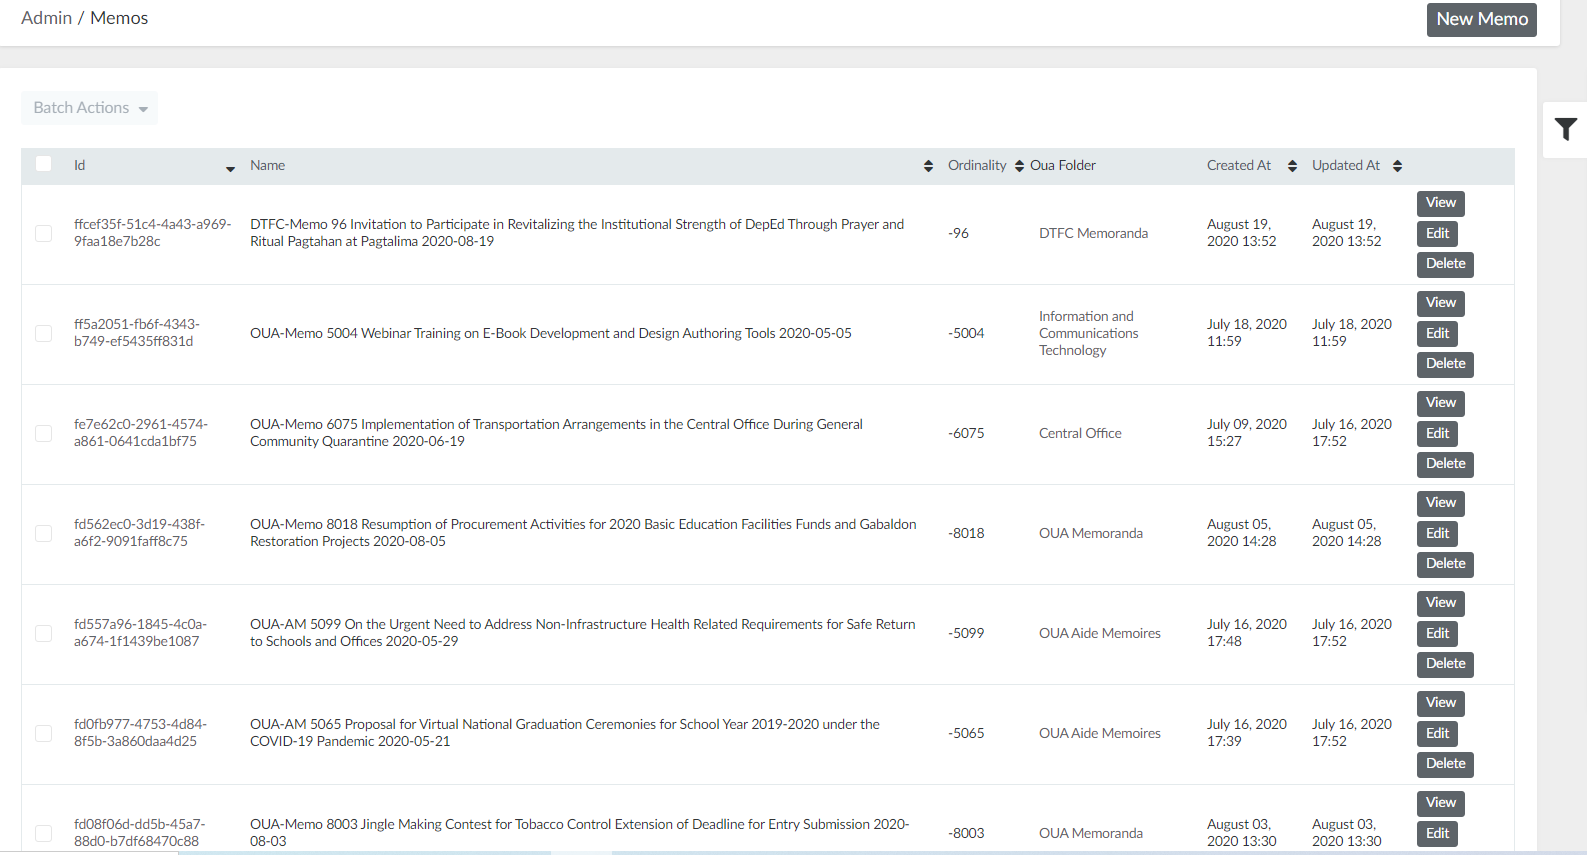
Figure 22. Memos List
11.3.2. Create a New Memos
Step 2. On the upper-right portion of the page, click the "New Memo" button.
Step 3. Fill out the new memo form. Select which OUA folder the memo belongs to and attach the file.
Step 4. Click the "Create Memo" button.
11.3.3. View a Memo
Step 2. Search the specific memo, and click the View button on the right.
In the view page, you can see the general information about the memo.
11.3.4. Edit a Memo
Step 2. Search the specific memo, and click the Edit button on the right.
Step 3. Update the memo details.
Step 4. Click the "Update Memo" button.
11.3.5 Delete a Memo
Step 2. Search the specific memos, and click the Delete button on the right.
You can also delete multiple memos at the same time. Select multiple memos by ticking the box on the left. Click "Batch Actions", then "Delete Selected".
Figure 23. Delete Multiple Memos
12. School Setup Management
Administrators can setup regions, divisions, municipalities, barangays, and school. To manage these, click School Setup on the navigation bar and they should appear on the dropdown. As a Super Admin, you can create, view, or edit a region, division, municipality, barangay, and school.
12.1. Region
12.1.1. View Regions
To view the list of regions, simply click School Setup on the navigation bar and select Regions.
On the top, you can click on the headers to arrange the list. For example if you click on Name then it will display the regions in descending order alphabetically.
You can use the filter icon to search for a region by typing in a region name.
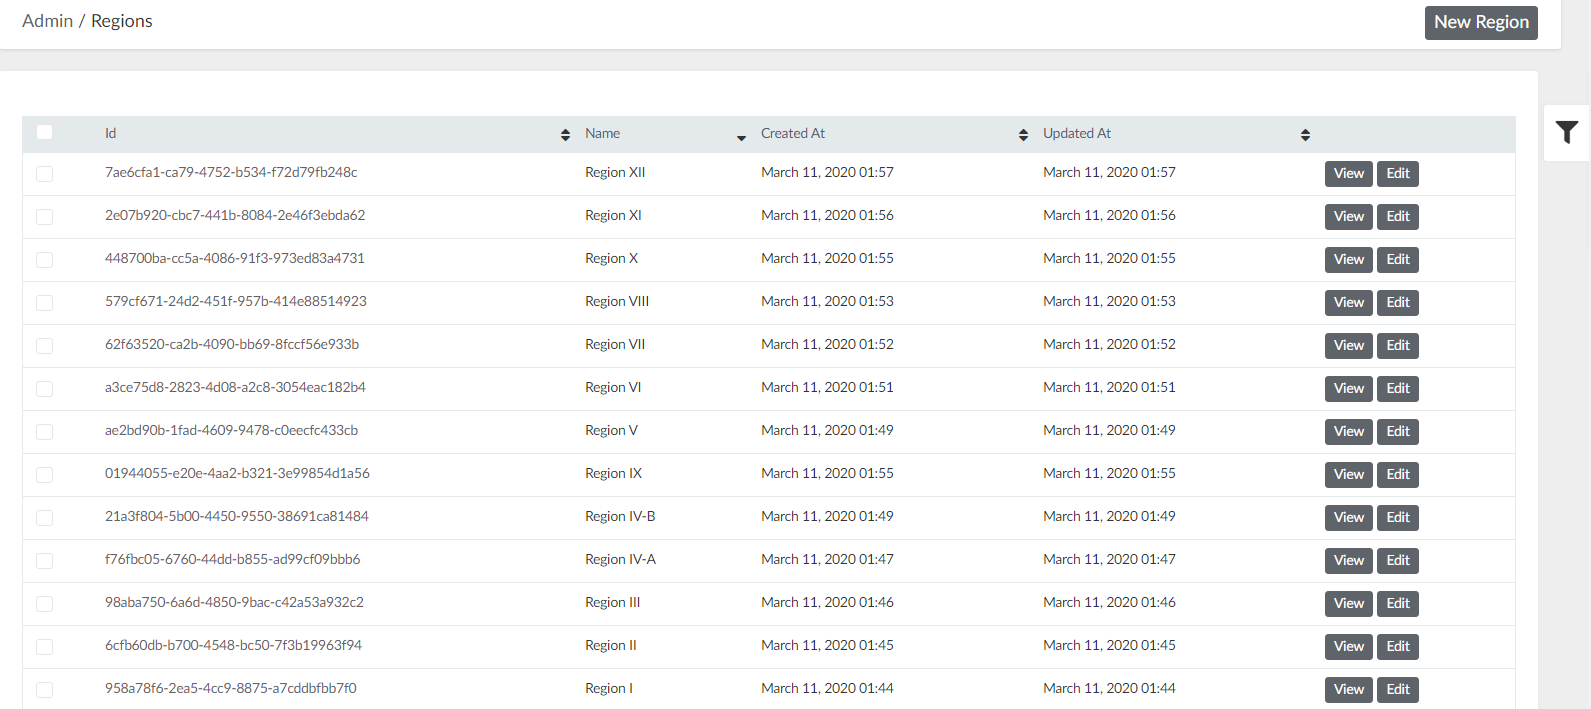
Figure 24. Regions List
12.1.2. Create a New Region
Step 2. On the upper-right portion of the page, click the "New Region" button.
Step 3. Fill out the form.
Step 4. Click the "Create Region" button.
12.1.3. View a Region
Step 2. Search the specific region, and click the View button on the right.
In the view page, you can see the general information about the region and the division located in the region.
12.1.4. Edit a Region
Step 2. Search the specific region, and click the Edit button on the right.
Step 3. Update region details.
Step 4. Click the "Update Region" button.
12.2. Division
12.2.1. View Divisions
To view the list of divisions, simply click School Setup on the navigation bar and select Divisions.
On the top, you can click on the headers to arrange the list. For example if you click on Name then it will display the divisions in descending order alphabetically.
You can use the filter icon to search for a division by typing in a division name.
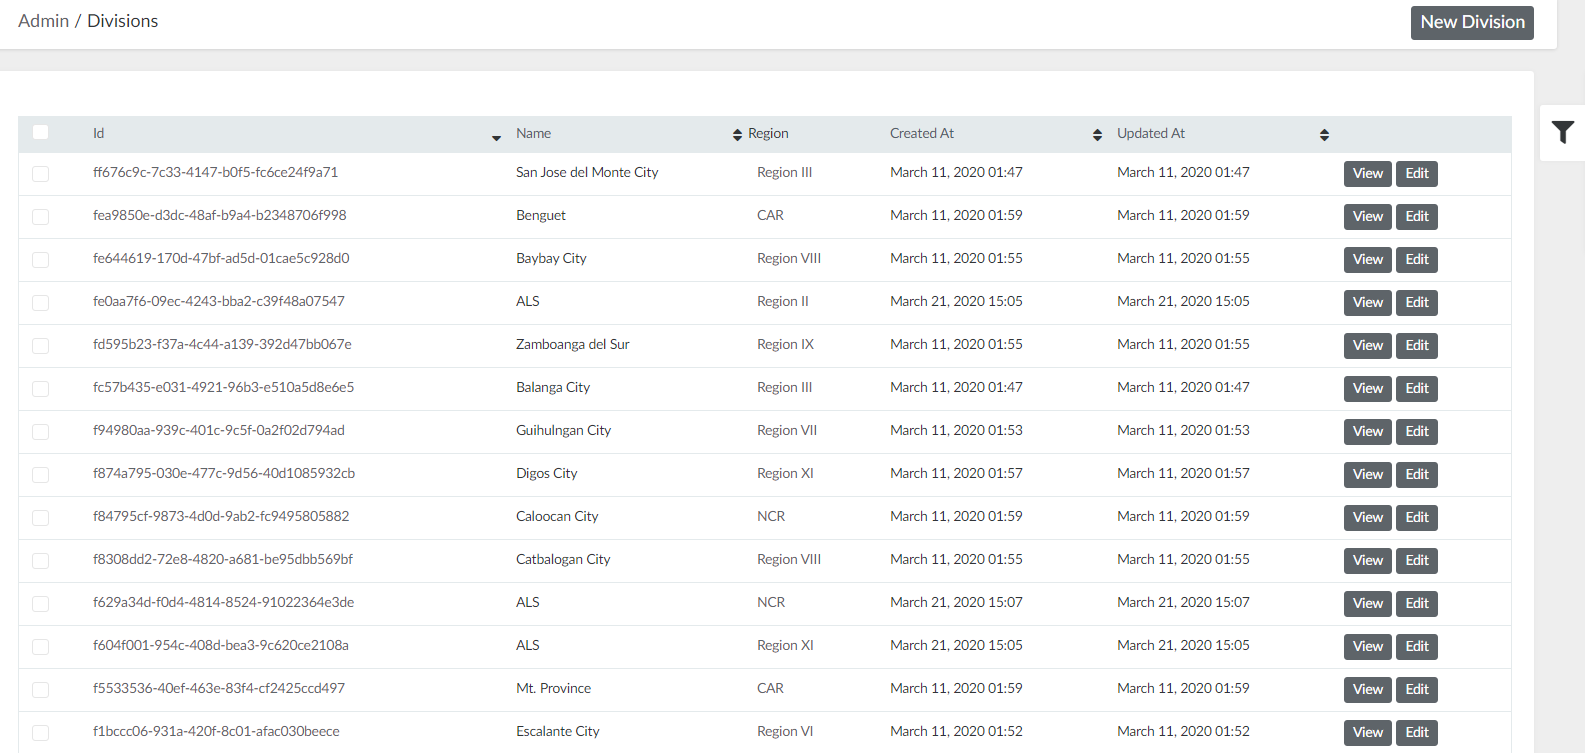
Figure 25. Divisions List
12.2.2. Create a New Division
Step 2. On the upper-right portion of the page, click the "New Division" button.
Step 3. Enter division name and select a Region where the Division is located.
Step 4. Click the "Create Division" button.
12.2.3. View a Division
Step 2. Search the specific division, and click the View button on the right.
In the view page, you can see the general information about the division and the municipalities located in the division.
12.2.4. Edit a Division
Step 2. Search the specific division, and click the Edit button on the right.
Step 3. Update division details.
Step 4. Click the "Update Division" button.
12.3. Municipality
12.3.1. View Municipalities
To view the list of municipalities, simply click School Setup on the navigation bar and select Municipalities.
On the top, you can click on the headers to arrange the list. For example if you click on Name then it will display the municipalities in descending order alphabetically.
You can use the filter icon to search for a municipality by typing in a municipality name.
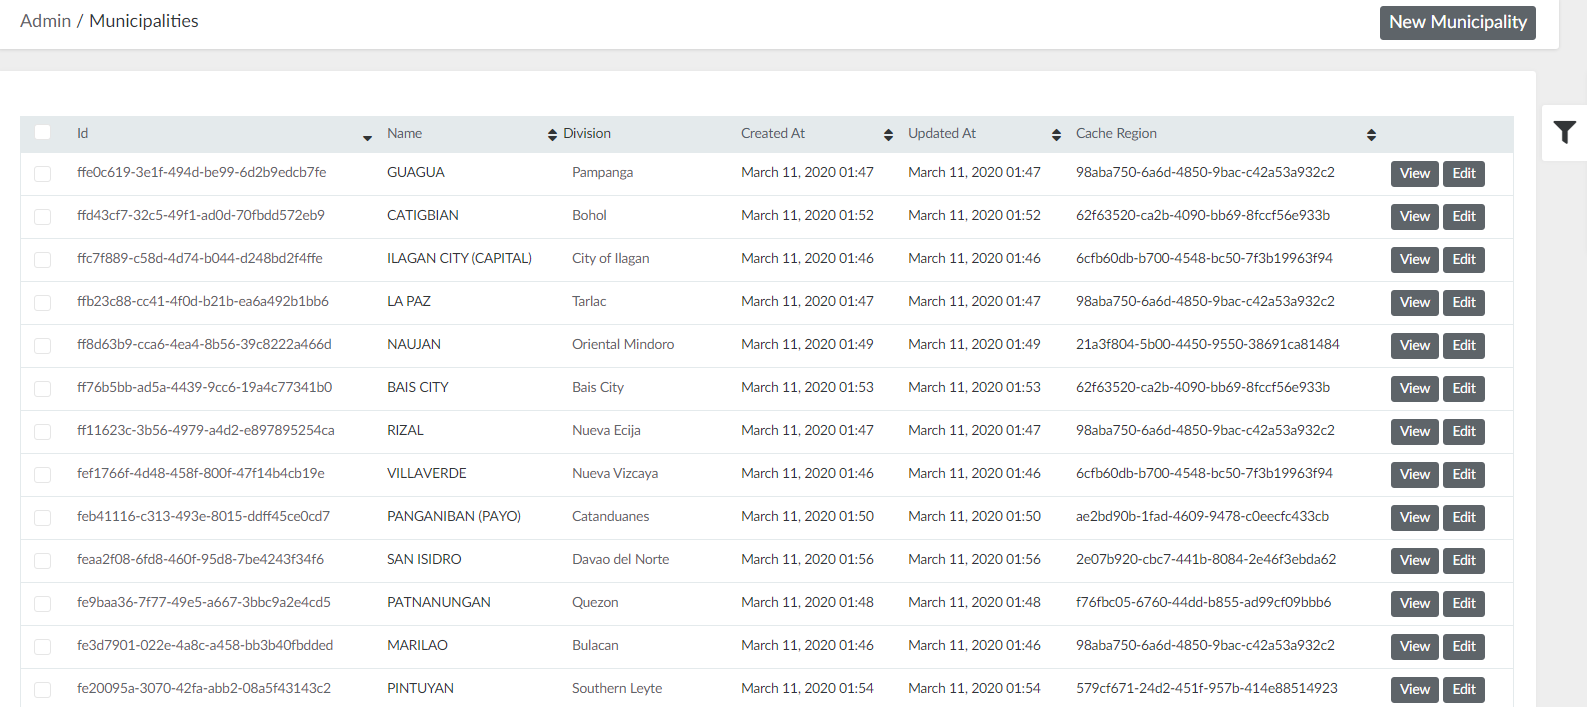
Figure 26. Municipalities List
12.3.2. Create a New Municipality
Step 2. On the upper-right portion of the page, click the "New Municipality" button.
Step 3. Enter municipality name and select a Division where the Municipality is located.
Step 4. Click the "Create Municipality" button.
12.3.3. View a Municipality
Step 2. Search the specific municipality, and click the View button on the right.
In the view page, you can see the general information about the municipality and the barangays located in the municipality.
12.3.4. Edit a Municipality
Step 2. Search the specific municipality, and click the Edit button on the right.
Step 3. Update municipality details.
Step 4. Click the "Update Municipality" button.
12.4. Barangay
12.4.1. View Barangays
To view the list of barangays, simply click School Setup on the navigation bar and select Barangays.
On the top, you can click on the headers to arrange the list. For example if you click on Name then it will display the barangays in descending order alphabetically.
You can use the filter icon to search for a barangay by typing in the barangay name.
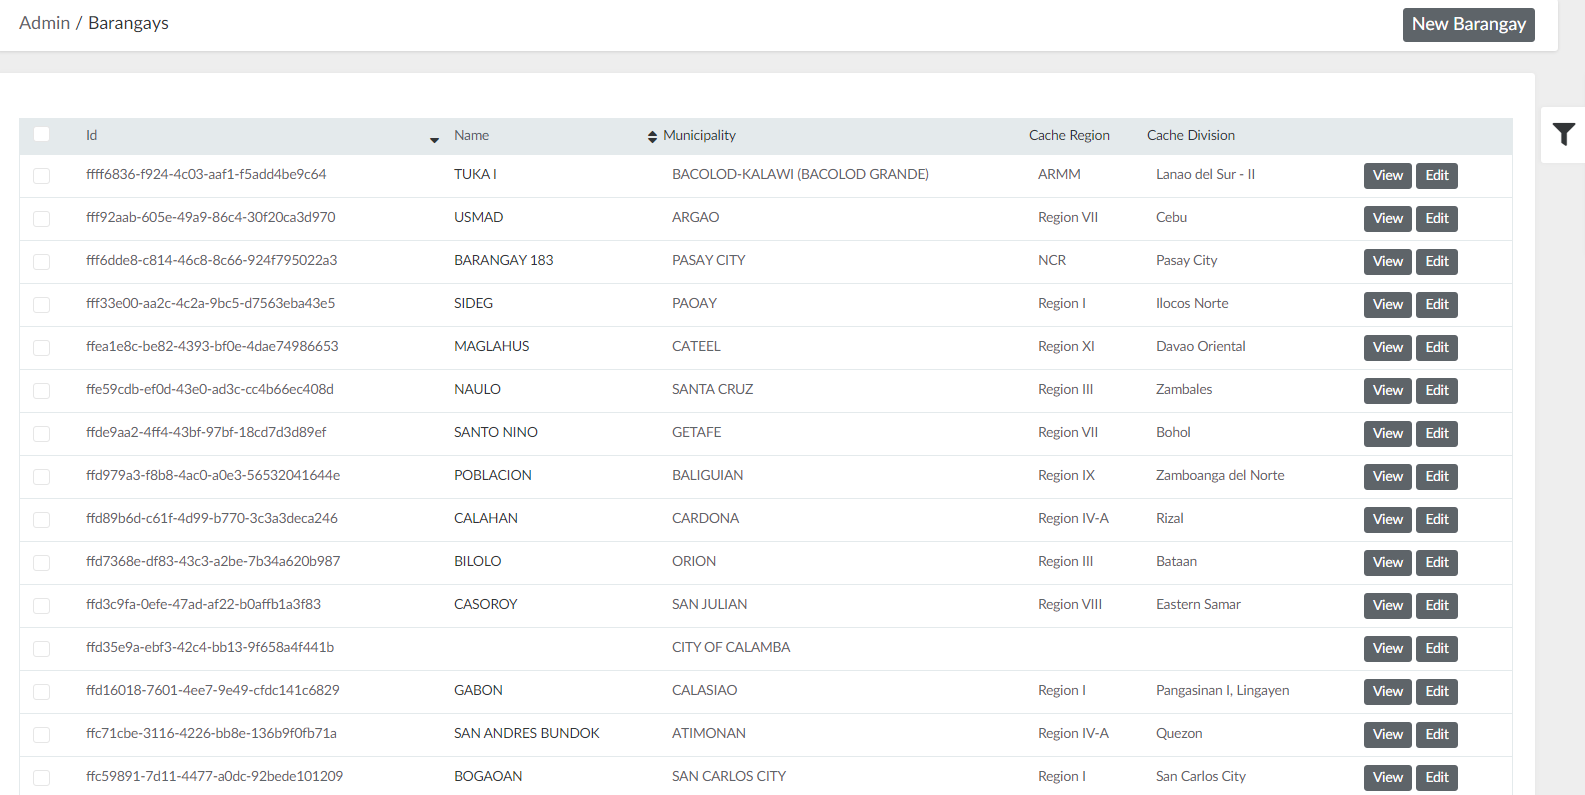
Figure 27. Barangays List
12.4.2. Create a New Barangay
Step 2. On the upper-right portion of the page, click the "New Barangay" button.
Step 3. Enter barangay name and select the Region, Division, and Municipality where the barangay is located.
Step 4. Click the "Create barangay" button.
12.4.3. View a Barangay
Step 2. Search the specific barangay, and click the View button on the right.
In the view page, you can see the general information about the barangay and the schools located within the barangay.
12.4.4. Edit a Barangay
Step 2. Search the specific barangay, and click the Edit button on the right.
Step 3. Update barangay details.
Step 4. Click the "Update barangay" button.
12.5. School
12.5.1. View Schools
To view the list of schools, simply click School Setup on the navigation bar and select Schools.
On the top, you can click on the headers to arrange the list. For example if you click on Name then it will display the schools in descending order alphabetically.
You can use the filter icon to search for a school by typing in the school name and by choosing if the institution is public or private.
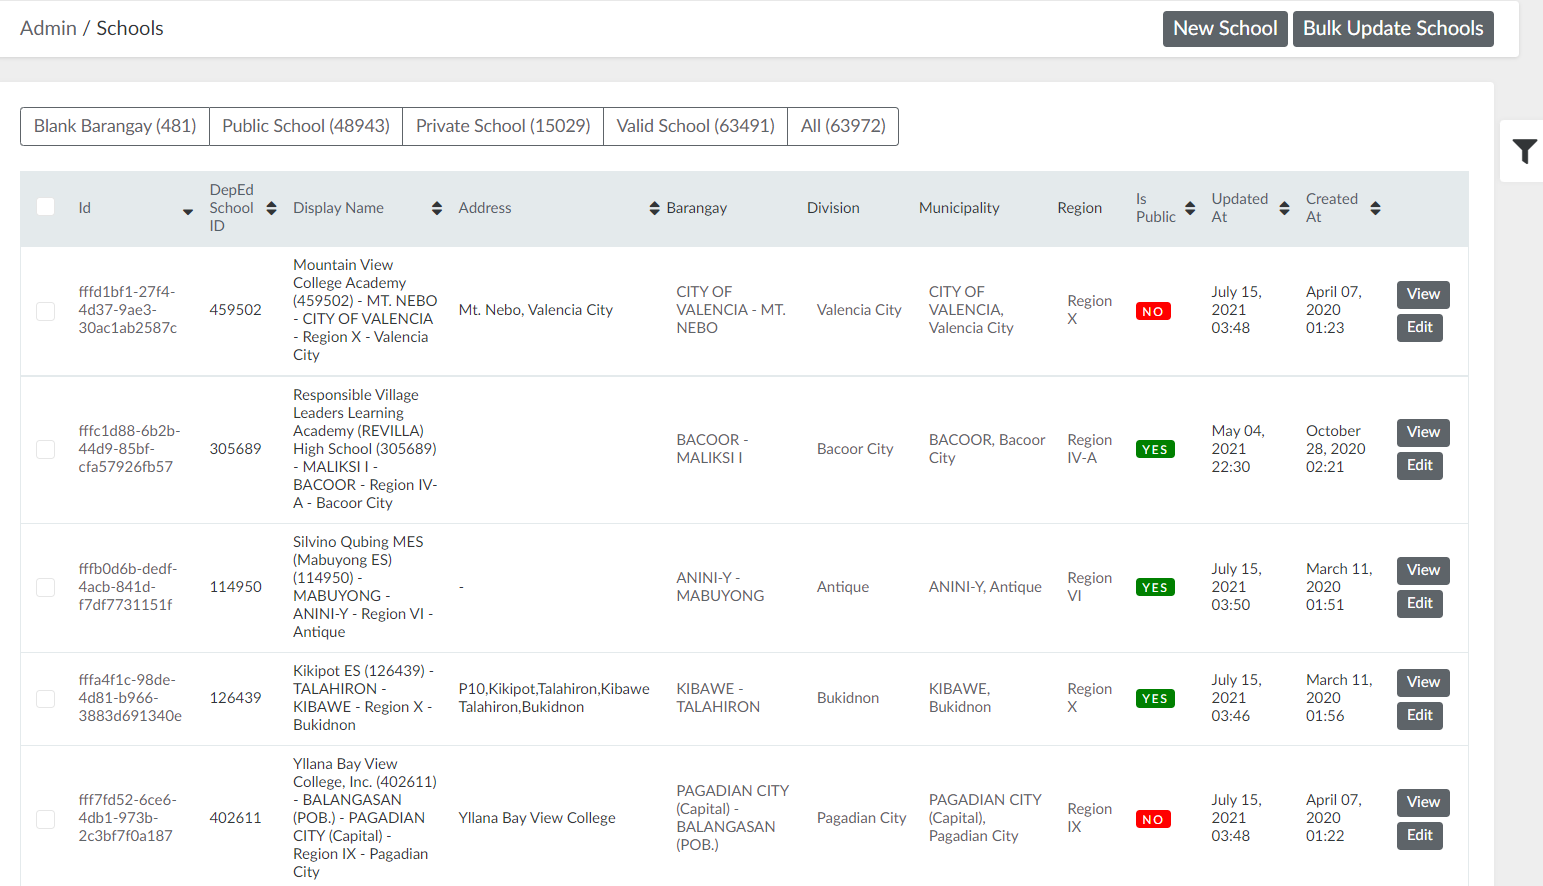
Figure 28. Schools List
12.5.2. Create a New School
Step 2. On the upper-right portion of the page, click the "New School" button.
Step 3. Fill out the form, select the barangay where the school is located, and tick Is Public box if the school is a public institution.
Step 4. Click the "Create School" button.
12.5.3. View a School
Step 2. Search the specific school, and click the View button on the right.
In the view page, you can see the general information about the school.
12.5.4. Edit a School
Step 2. Search the specific school, and click the Edit button on the right.
Step 3. Update school details.
Step 4. Click the "Update school" button.
12.5.5 Bulk Update Schools
Step 2. Click the Bulk Update Schools button on the upper right of the page.
Step 3. Download CSV template file and follow the template.
Step 4. One your CSV file is set, click Choose File and then click the Upload button.
To check the status of your bulk update for schools, go to School Setup then click Bulk School Update Records.
13. Setup Management
Administrators can setup resource types, third party apps, and visibility controls. To manage these, click Setup on the navigation bar and they should appear on the dropdown.
13.1. Resource Types
13.1.1. View Resource Types
To view the list of regions, simply click Setup on the navigation bar and select Resource Types.
On the top, you can click on the headers to arrange the list. For example if you click on Name then it will display the resource types in descending order alphabetically.
More filters are available if you click the filter icon on the right. Available filter fields are: Name, Created at, and Updated at.
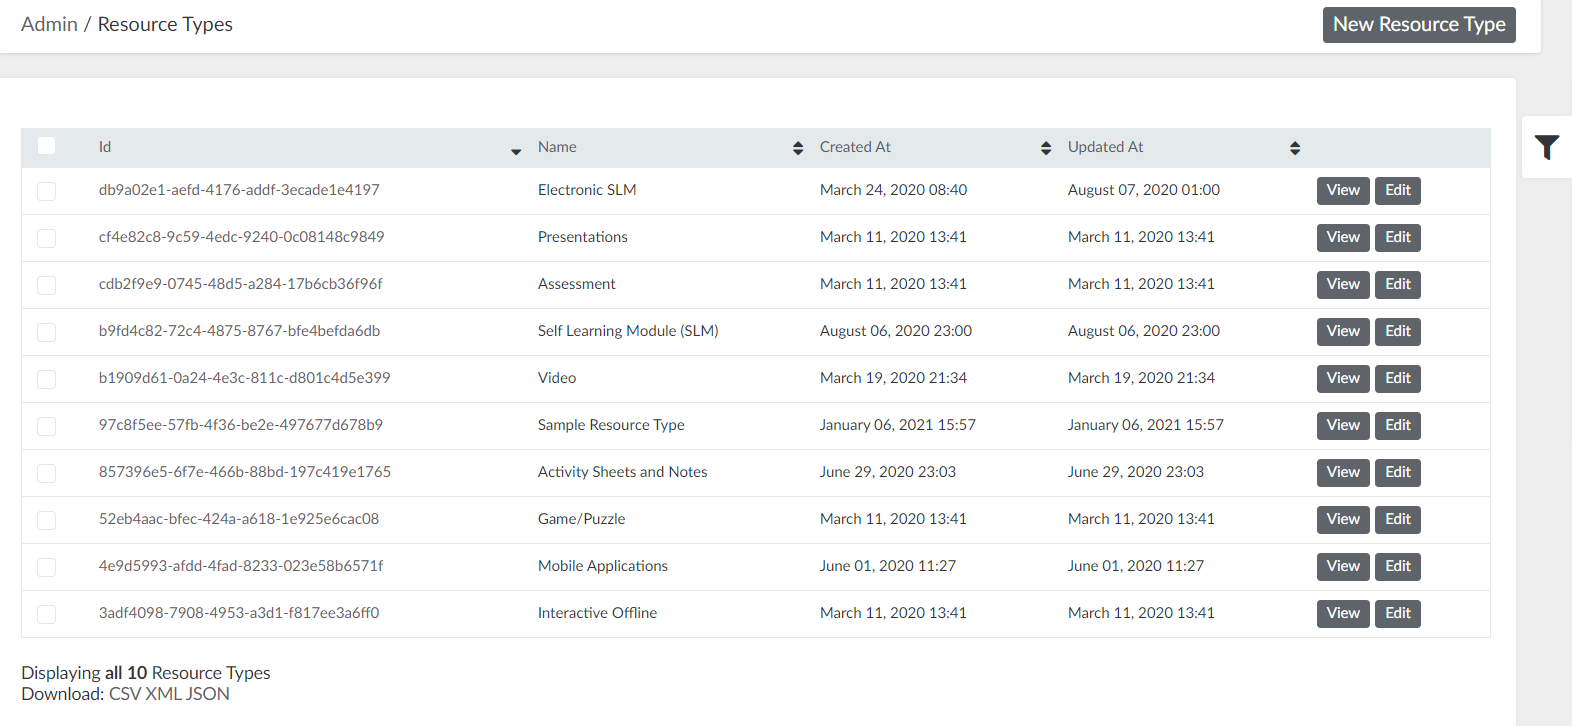
Figure 29. Resource Types List
13.1.2. Create a New Resource Type
Step 2. On the upper-right portion of the page, click the "New Resource Type" button.
Step 3. Fill out the form.
Step 4. Click the "Create Resource Type" button.
13.1.3. View a Resource Type
Step 2. Search the specific resource type, and click the View button on the right.
In the view page, you can see the general information about the resource type.
13.1.4. Edit a Resource Type
Step 2. Search the specific resource type, and click the Edit button on the right.
Step 3. Update resource type details.
Step 4. Click the "Update Resource Type" button.
13.2. Third Party Apps
13.2.1. View Third Party Apps
To view the list of third party apps, simply click Setup on the navigation bar and select Third Party Apps.
On the top, you can click on the headers to arrange the list. For example if you click on Name then it will display the third party apps on descending order alphabetically.
You can use the filter icon to search for a third party app by typing in its name.
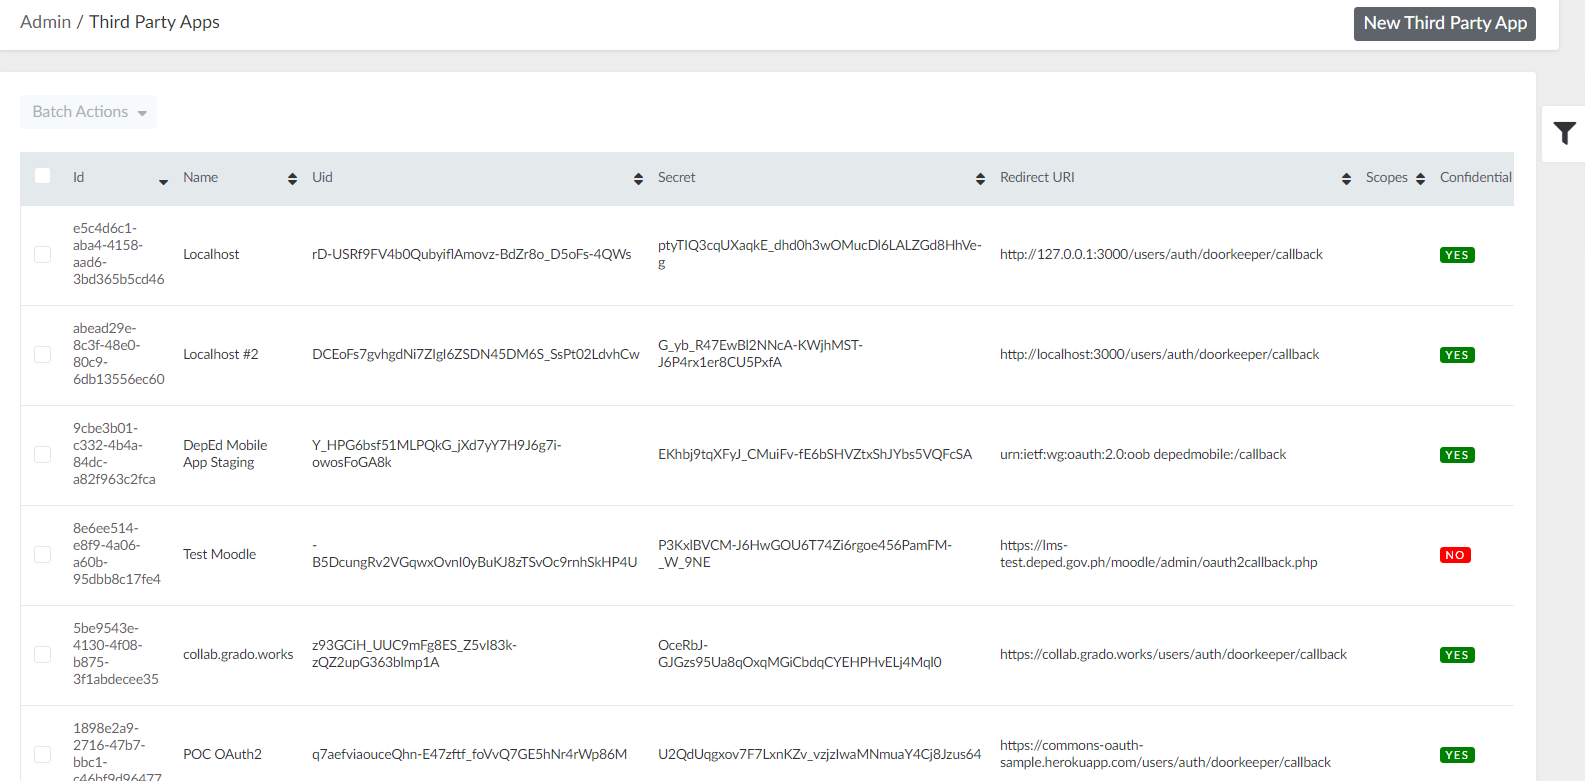
Figure 30. Third Party Apps List
13.2.2. Create a New Third Party App
Step 2. On the upper-right portion of the page, click the "New Third Party App" button.
Step 3. Fill out the form and mark the box next to Confidential if you want the third party app to be confidential.
Step 4. Click the "Create Third Party App" button.
13.2.3. View a Third Party App
Step 2. Search the specific third party app, and click the View button on the right.
In the view page, you can see the general information about the third party app.
13.2.4. Edit a Third Party App
Step 2. Search the specific third party app, and click the Edit button on the right.
Step 3. Update third party app details.
Step 4. Click the "Update Application" button.
13.2.5 Delete a Third Party App
Step 2. Search the specific third party app, and click the Delete button on the right.
You can also delete multiple third party apps at the same time. Select multiple third party apps by ticking the box on the left. Click "Batch Actions", then "Delete Selected".
Figure 31. Delete Multiple Third Party Apps
13.3. Visibility Controls
To view the list of visibility controls, simply click Setup on the navigation bar and select Visibility Controls.
In this page, you will see the Learning Periods with an on and off switch for Student and Teacher Accounts. If the toggle is turned on, it means that published documents on that learning period is visible to the user account otherwise, published documents on that learning period will not be visible to the user account.

Figure 32. Visibility Control Page
14. Reports
Administrators can view different types of reports. To access the reports, click Reports on the navigation and a drop down will show other links: Document Reports, Interaction Reports, Signed Account Reports, and User Reports.
14.1. Document Reports
To view the list of document reports, simply click Reports on the navigation bar and select Document Reports.
In this page you will see total number of uploaded documents, daily number of documents created over the past month, daily number of documents published over the past month, and monthly number of documents created over the past year. The total number of documents by grade and by category along with the number of published documents are also displayed on this page. All of the reports are generated once a day, and cached every 24 hours.
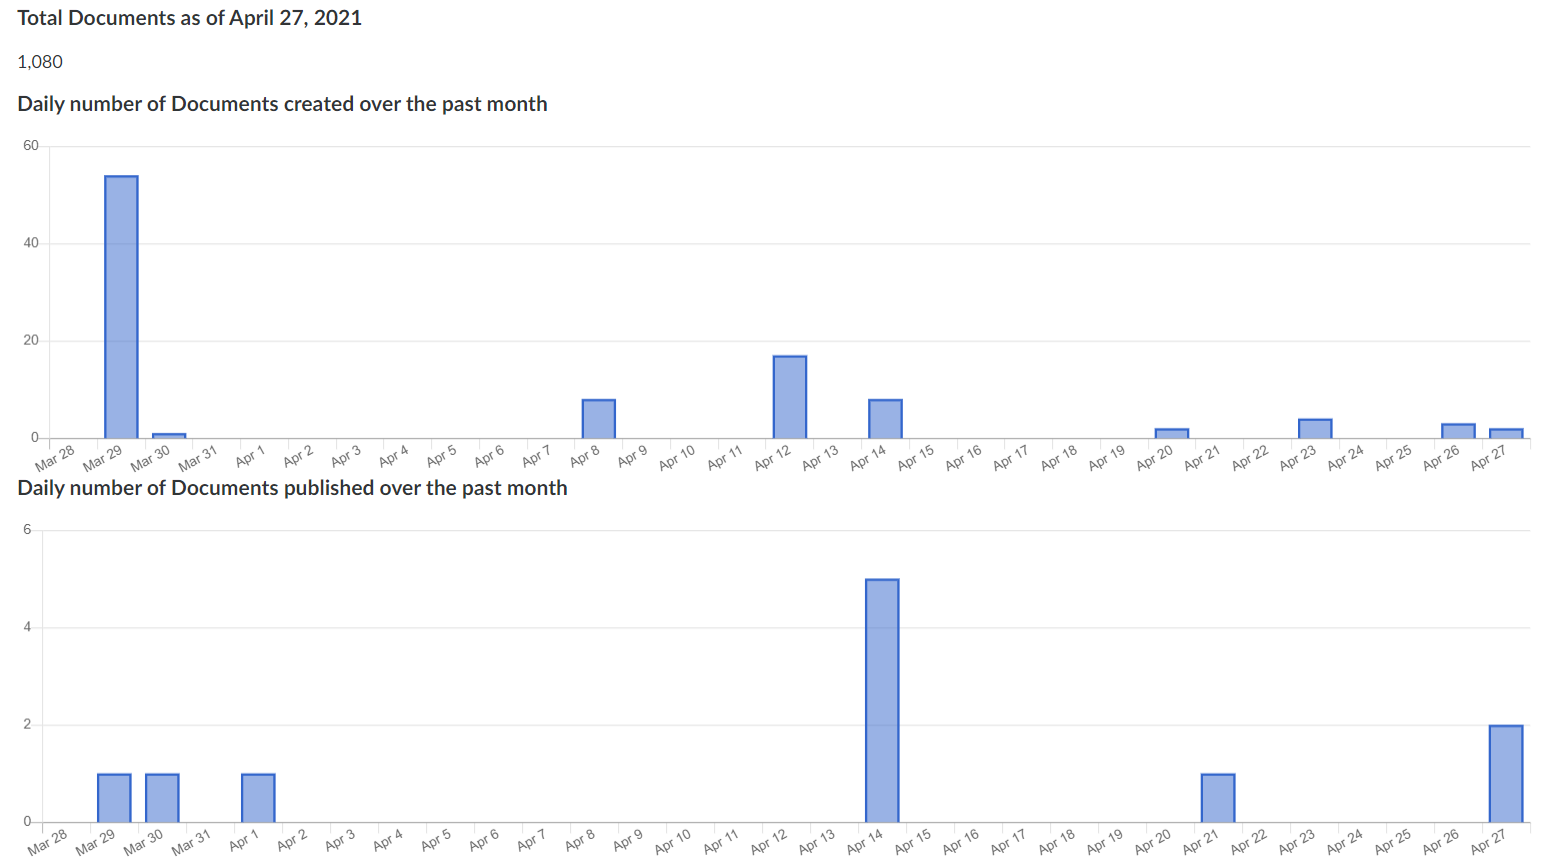
Figure 33. Document Statistics Presented Using a Bar Graph
14.2. Interaction Reports
To view the list of interaction reports, simply click Reports on the navigation bar and select Interaction Reports.
In this page you will see the total number of guests' document downloads/views per category, the top 20 most viewed documents, and the most rated documents.
14.3. Signed Account Reports
To view the list of signed account reports, simply click Reports on the navigation bar and select Signed Account Reports.
In this page you will see the activation statistics for student and teacher accounts and the regional and per division distribution of teacher and student accounts.
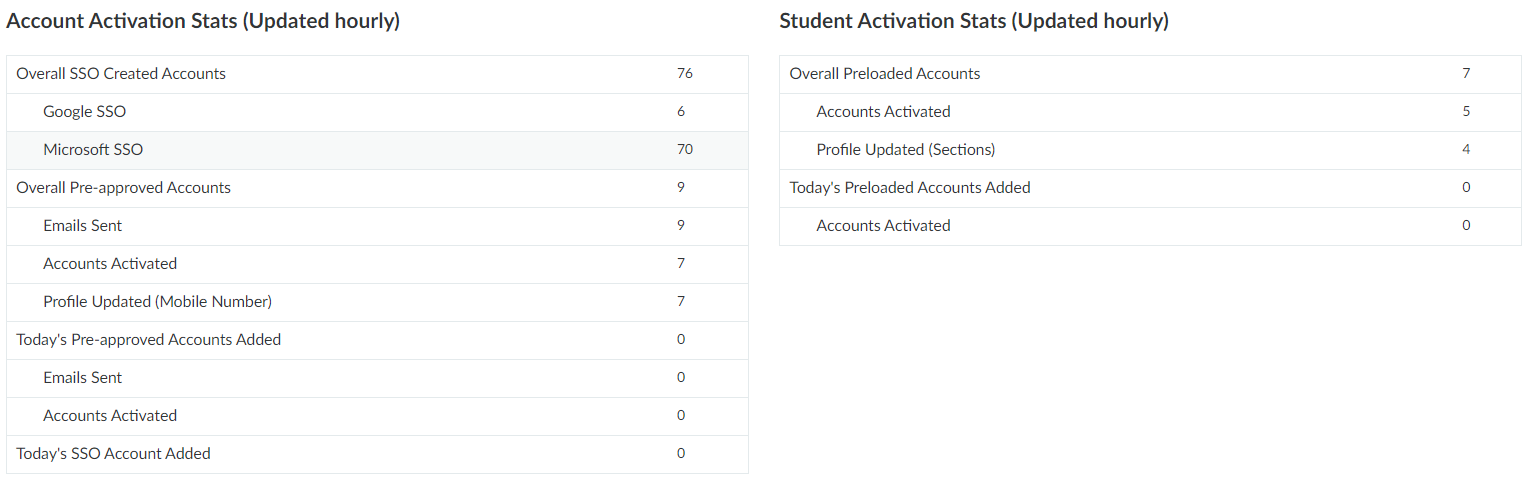
Figure 34. Activation Statistics for Teacher and Student Accounts
14.4. User Reports
To view the list of user reports, simply click Reports on the navigation bar and select User Reports.
In this page you will see the total number of users, unique user per region and division, daily unique users and new users, daily number of unique users over the past month, and monthly number of unique users over the past year.