Guide for CI Approver
Table of Contents
1. Login as an Administrator
The homepage of DepEd Commons is at https://commons.deped.gov.ph/admin/. To login as an administrator, input your administrator credentials on the login form. Click login and you will be redirected to the Admin Portal Dashboard.
On your initial login, you will be redirected to your account profile. You will be asked to update your temporary password.

Figure 1. DepEd Commons Admin Login Page
2. Admin Portal Interface
The user interface for the Admin Portal is very straightforward and easy-to-use. In this chapter, we will discuss the four (4) main parts of this portal.
- Navigation Bar - In this portion, you will see a list of links that will help you access different parts of the Admin Portal.
- Main Content - In this portion, all of the information are displayed in table form. There will be action buttons (view and edit) for each row. There is also a New Document button in this portion.
- Account actions - you can view your account by clicking this button
 . To logout, simply click this button
  .
. - Filter - to narrow down the list or data displayed in the Main content, you can use the filter fields in this portion. The available fields are: Category, Grade, Learning Period, Title, Description, Uploader, Approver, CI Approver, Overall rating, Scheduled for Publish.
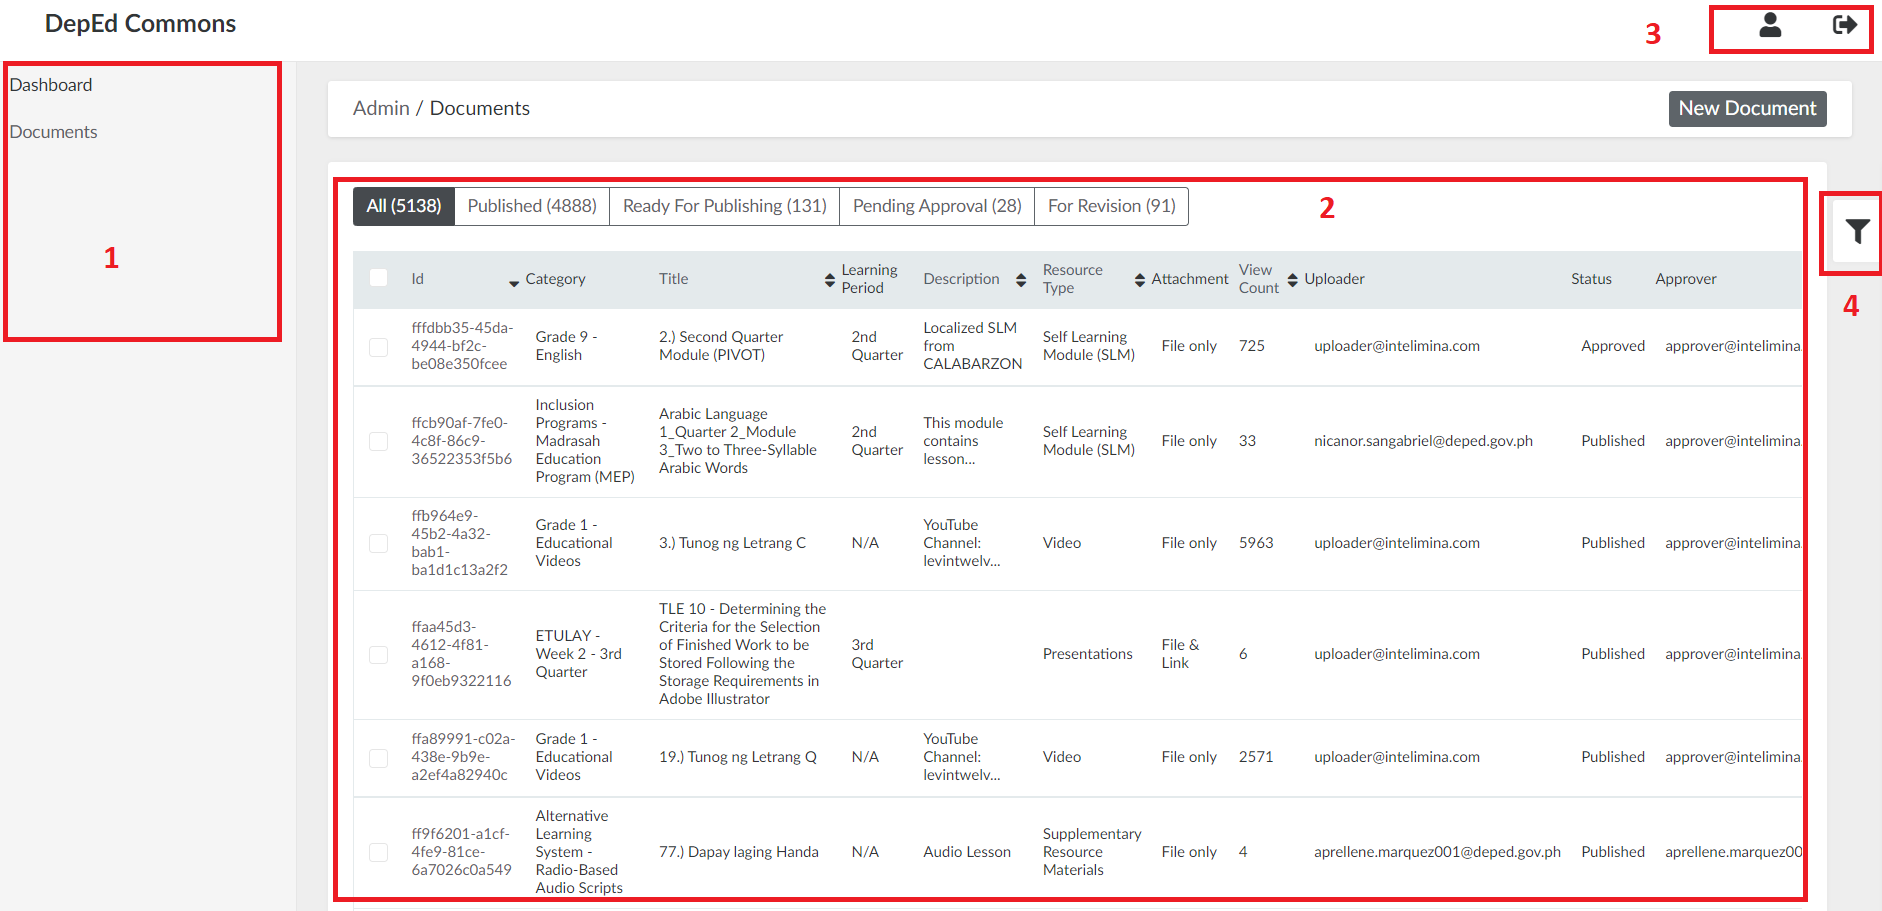
Figure 2. Admin Portal Dashboard
3. Document Management
There are five kinds of users in DepEd Commons: an administrator, an uploader, an approver, a teacher, and a student. As a Super Admin, you have the access to manage all user types. You can create, view, edit, and delete an administrator and a user.
3.1. View Document List
To view all the documents, click Documents on the side navigation bar.
On the top, you can filter the list by the document's status (published, ready for publishing, pending approval, and for revision).
More filters are available if you click the filter icon on the right. Available filter fields are: Category, Grade, Learning Period, Title, Description, Uploader, Approver, CI Approver, Overall rating, Scheduled for Publish.
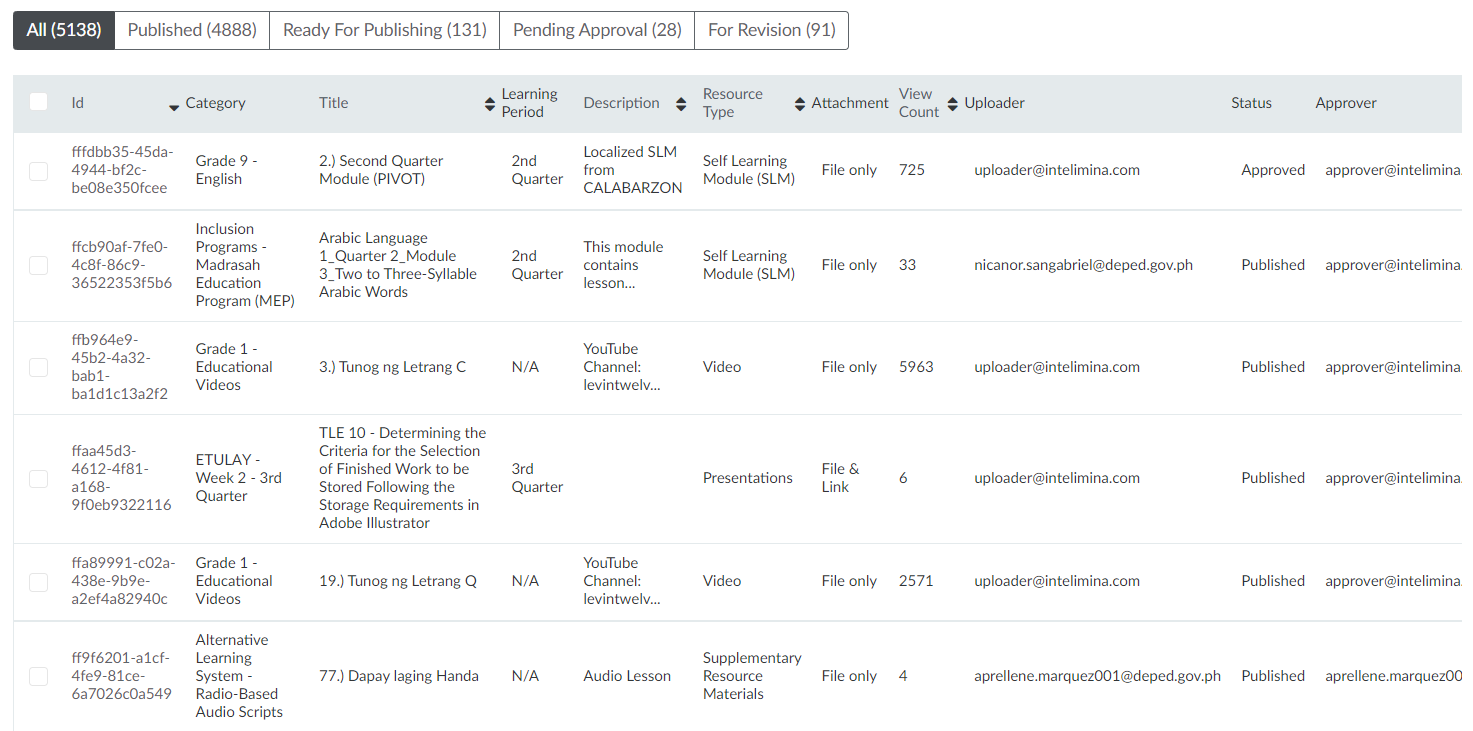
Figure 3. Documents List
3.2. Create a New Document
Step 2. On the upper-right portion of the page, click the "New Document" button.
Step 3. Fill out the new document form.
- Category - grade level and subject where the document will be uploaded to.
- Title - the title of the resource that will be displayed on the web app.
- Description - details or other relevant information to describe the document.
- Link - link to access the document online
- Learning period - learning period that the document will be accessible
- Resource type - type of learning material
- Authors - author/s of the document
- Contributors - contributors of the document
- Tags - relevant keywords that can be used to search for the document
- File - file attachment of the document
- Thumbnail - the image that will be displayed when viewing document details
Step 4. Click the "Create Document" button.
3.3. View Document
Step 2. Search the specific document, and click the View button on the right.
In the view page, you can see the general information and status of the document.
To view document reports, click on View Reports. This will show Daily views over the past month and monthly views over the past year.
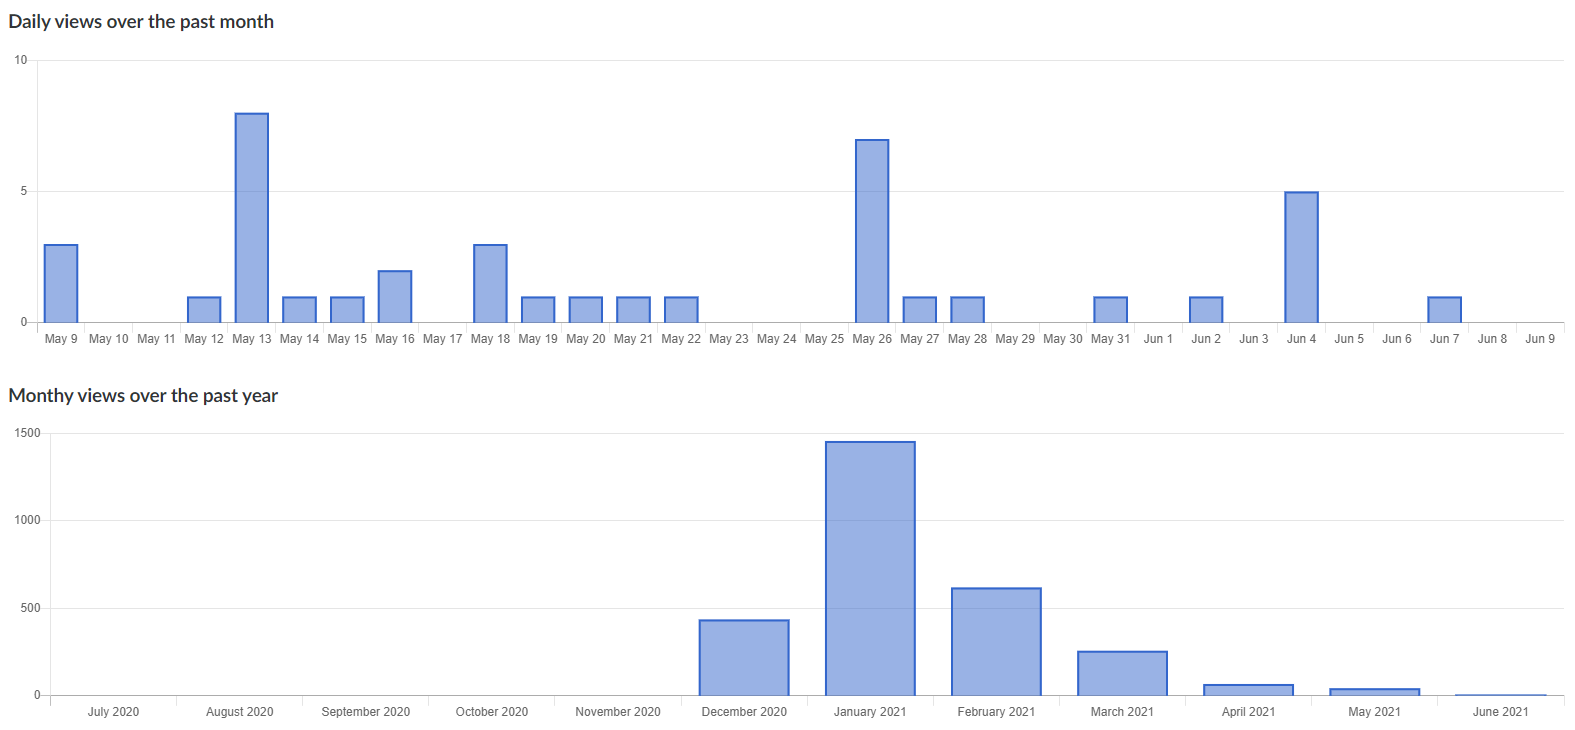
Figure 4. Document Report
3.3. Edit Document
Step 2. Search the specific document, and click the Edit button on the right.
Step 3. Update the document details.
Step 4. Click the "Update Document " button.