Guide for DITO
Table of Contents
3.1.2. Create a New Teacher Account
3.1.3. View a Specific Teacher Account
3.1.6. Delete a Teacher Account
3.2.2. Create a New Student Account
3.2.5. Delete a Student Account
1. Login as a DITO
The homepage of DepEd Commons is at https://commons.deped.gov.ph/admin/. To login as a DITO, input your administrator credentials on the login form. Click login and you will be redirected to the Admin Portal Dashboard.
On your initial login, you will be redirected to your account profile. You will be asked to update your temporary password.

Figure 1. DepEd Commons Admin Login Page
2. Admin Portal Interface
The user interface for the Admin Portal is very straightforward and easy-to-use. In this chapter, we will discuss the three (3) main parts of this portal.
- Navigation Bar - In this portion, you will see a list of links that will help you access different parts of the Admin Portal.
- Main Content - In this portion, all of the information are displayed in table form. There will be action buttons (view, edit, or delete) for each row. In most modules, there will be a New button displayed on the upper-right part.
- Account actions - you can view your account by clicking this button
 . To logout, simply click this button
  .
.
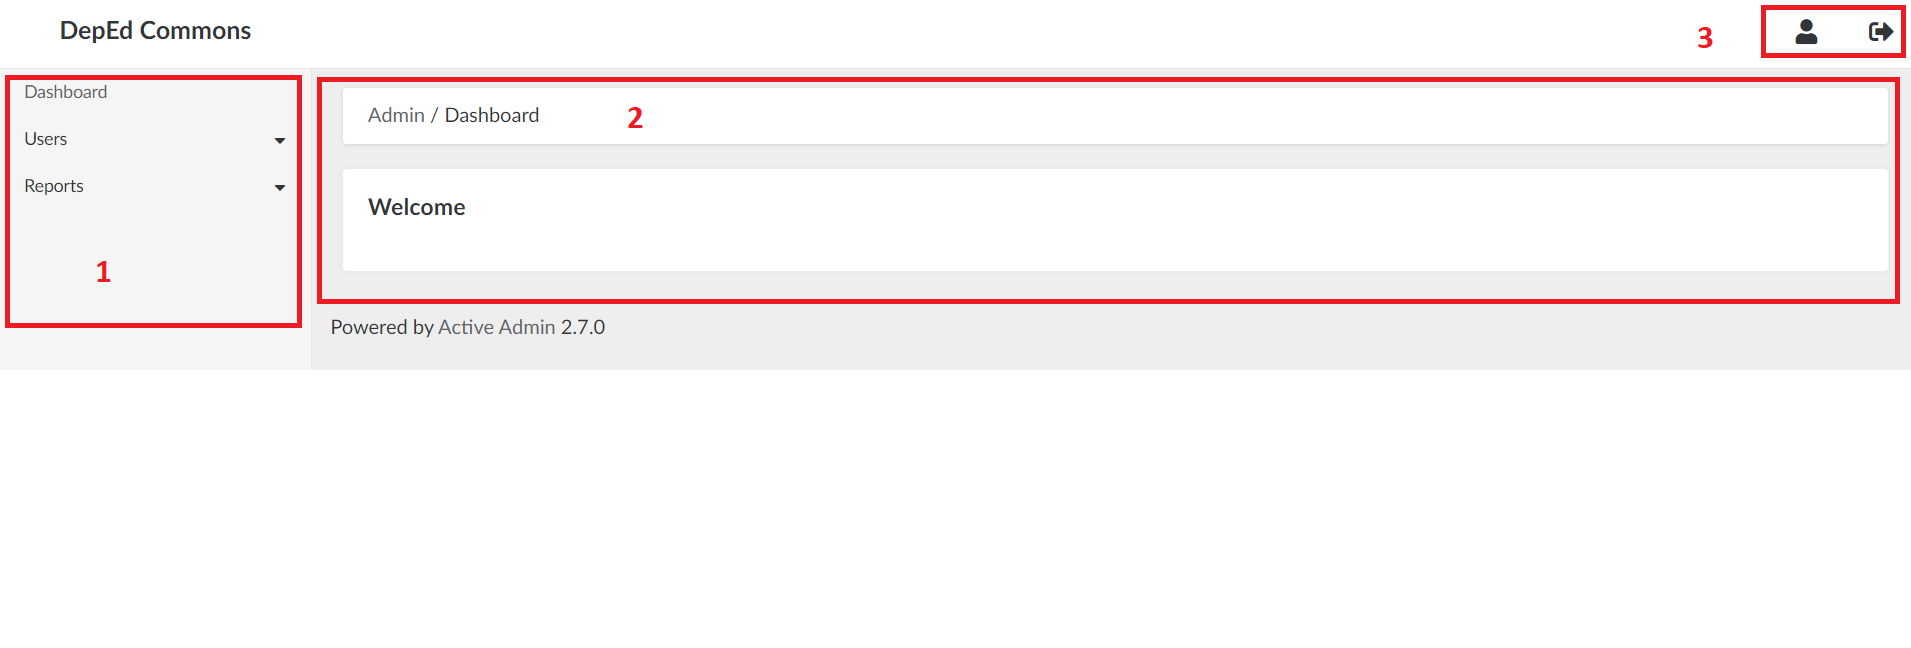
Figure 2. Admin Portal Dashboard
The dashboard is the homepage of the Admin Portal. It contains the bulk upload script, the link to send user report to your email, and teacher's telco demographics.
3. User Management
There are five kinds of users in DepEd Commons: an administrator, an uploader, an approver, a teacher, and a student. As a DITO, you have the access to manage teacher and student accounts. You can create, view, edit, and delete these two types of users.
3.1. Teacher
This chapter will focus on managing teacher accounts. As a DITO, you can view the list of teachers, create a new one, and you can also view, edit or delete an existing one.
3.1.1. View Teacher List
To view teacher accounts, simply click Users on the navigation bar and select Teacher Accounts.
On the top, you can filter the list by clicking a specific status:
- Pre-approved - users that have been added to the database of the system and will no longer need to sign up
- Self-signed - users that have gone through the signup process
More filters are available if you click the filter icon on the right. Available filter fields are: Name, Email address, Is Teaching, Invite Sent, Confirmed, Verified, Region, Division, and Municipality.
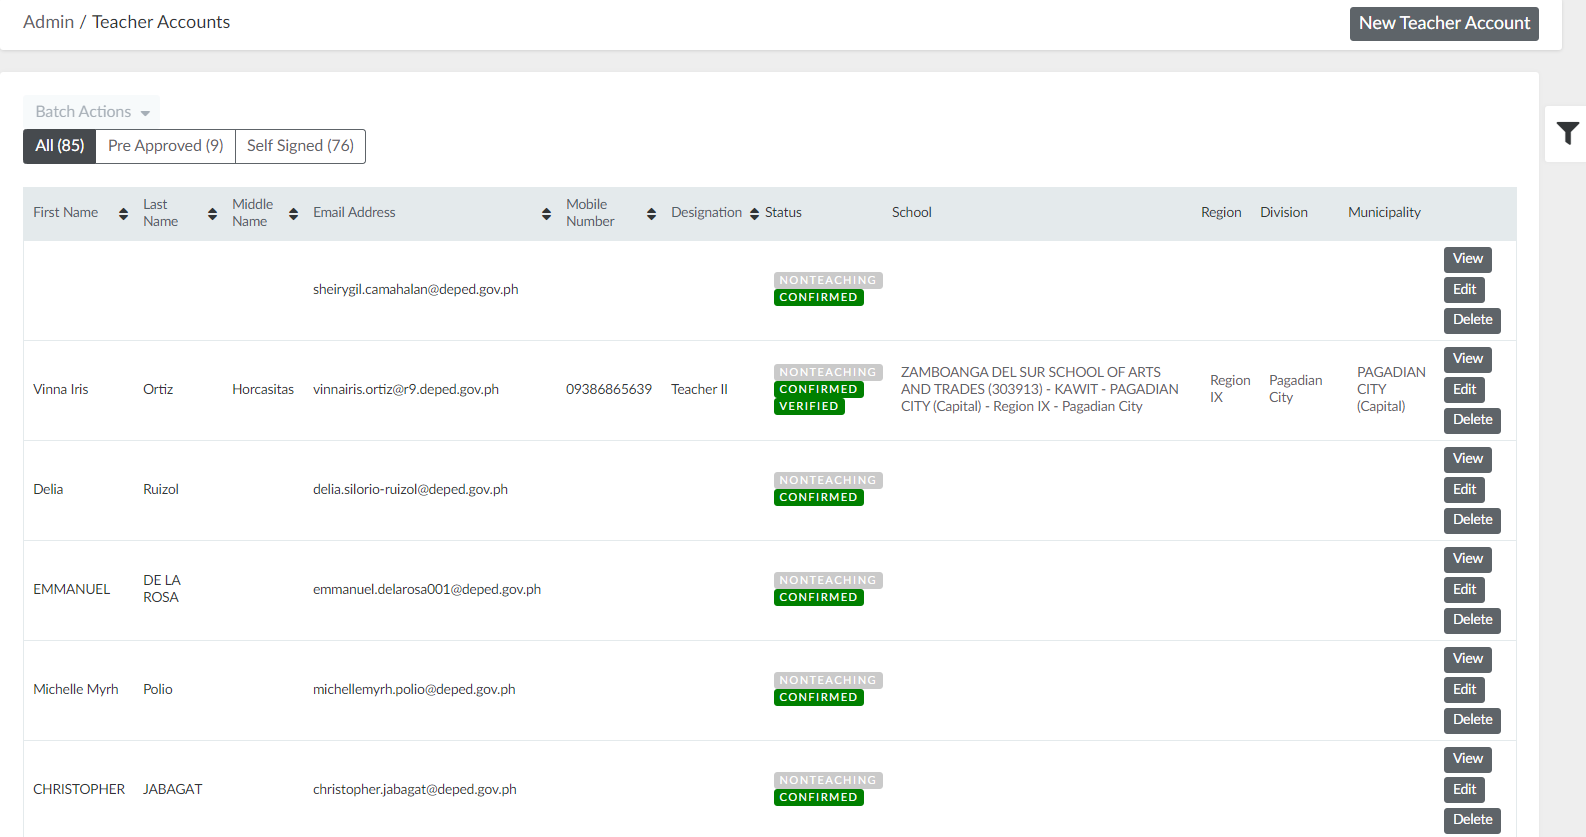
Figure 3. Teacher Accounts List
3.1.2. Create a New Teacher Account
Step 2. On the upper-right portion of the page, click the "New Teacher Account" button.
Step 3. Fill out the new user form (account information, personal info, and location assignment).
Step 4. Click the "Create Account" button.
After creating a user, a confirmation email will be sent to them. This is part of their approval process, so it is very important that you have encoded the correct email address.
3.1.3. View a Specific Teacher Account
Step 2. Search the specific user, and click the View button on the right.
In the view page, you can see the following data:
-
- Teacher Account Details - general information of the user
- Contact Info and Status - contains email address of user and account status
3.1.4. Verify User
An account can only be verified if the user has already confirmed their email address. To verify a teacher account, follow these simple steps:
Step 2. Click the View button on the right.
Step 4. Click the Verify button on the upper-right portion of the view page.
3.1.5. Edit a Teacher Account
Step 2. Search the specific user, and click the Edit button on the right.
Step 3. Update the account details.
Step 4. Click the "Update Account" button.
3.1.6. Delete a Teacher Account
Step 2. Search the specific user, and click the Delete button on the right.
3.2. Student
This chapter will focus on managing student accounts. As a DITO, you can view the list of students, create a new one, and you can also view, edit or delete an existing one.
3.2.1. View Student List
To view student accounts, simply click Users on the navigation bar and select Student.
On the top, you can click on the headers to arrange the list. For example if you click on Confirmed At then it will display the most recently confirmed student account.
More filters are available if you click the filter icon on the right. Available filter fields are: Email address and Activated.
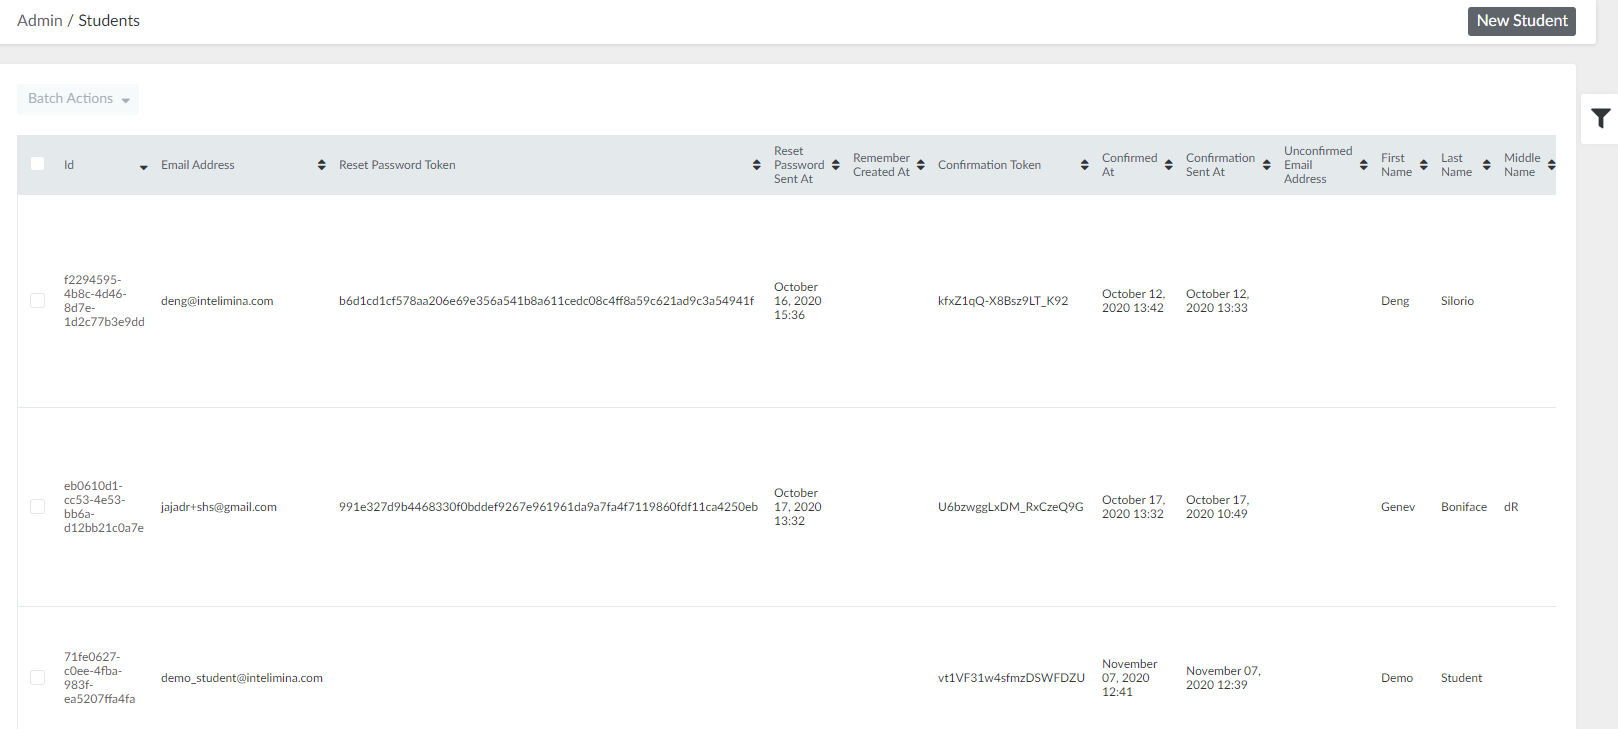
Figure 4. Student Accounts List
3.2.2. Create a New Student Account
Step 2. On the upper-right portion of the page, click the "New Student" button.
Step 3. Fill out the new user form (profile and credentials).
Step 4. Click the "Create Student" button.
After creating a user, a confirmation email will be sent to them. This is part of their approval process, so it is very important that you have encoded the correct email address.
3.2.3. View a Student Account
Step 2. Search the specific user, and click the View button on the right.
In the view page, you can see the general information about the student account.
3.2.4. Edit a Student Account
Step 2. Search the specific user, and click the Edit button on the right.
Step 3. Update the account details.
Step 4. Click the "Update Student" button.
3.2.5. Delete a Student Account
Step 2. Search the specific user, and click the Delete button on the right.
4. Reports
To view the activation statistics of the signed accounts from your division, click on Reports then Signed Account Reports. You will see a table for teacher’s stats and a separate table for students. This report contains the number of created accounts via SSO and via DepEd Commons portal, the number of pre-approved accounts, and the number of activated accounts. This report is updated on an hourly basis.
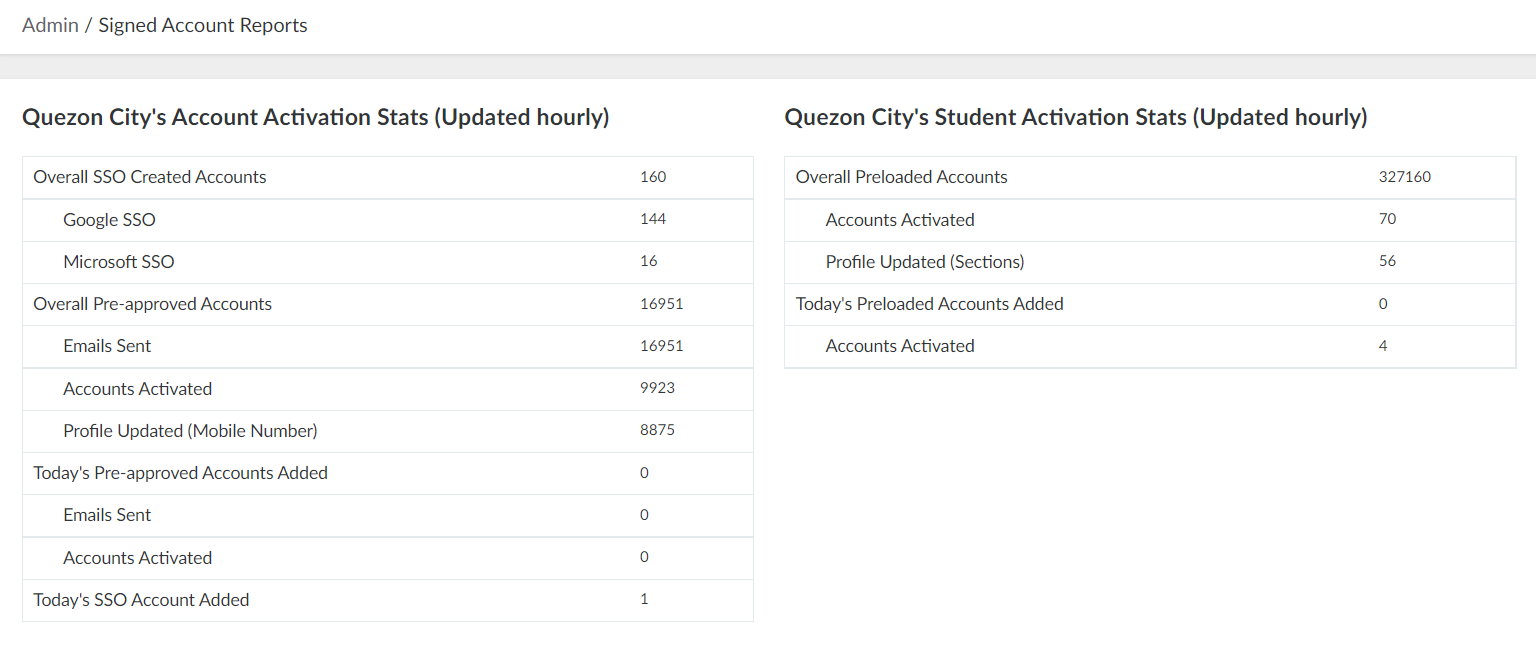
Figure 5. Signed Account Activation Statistics